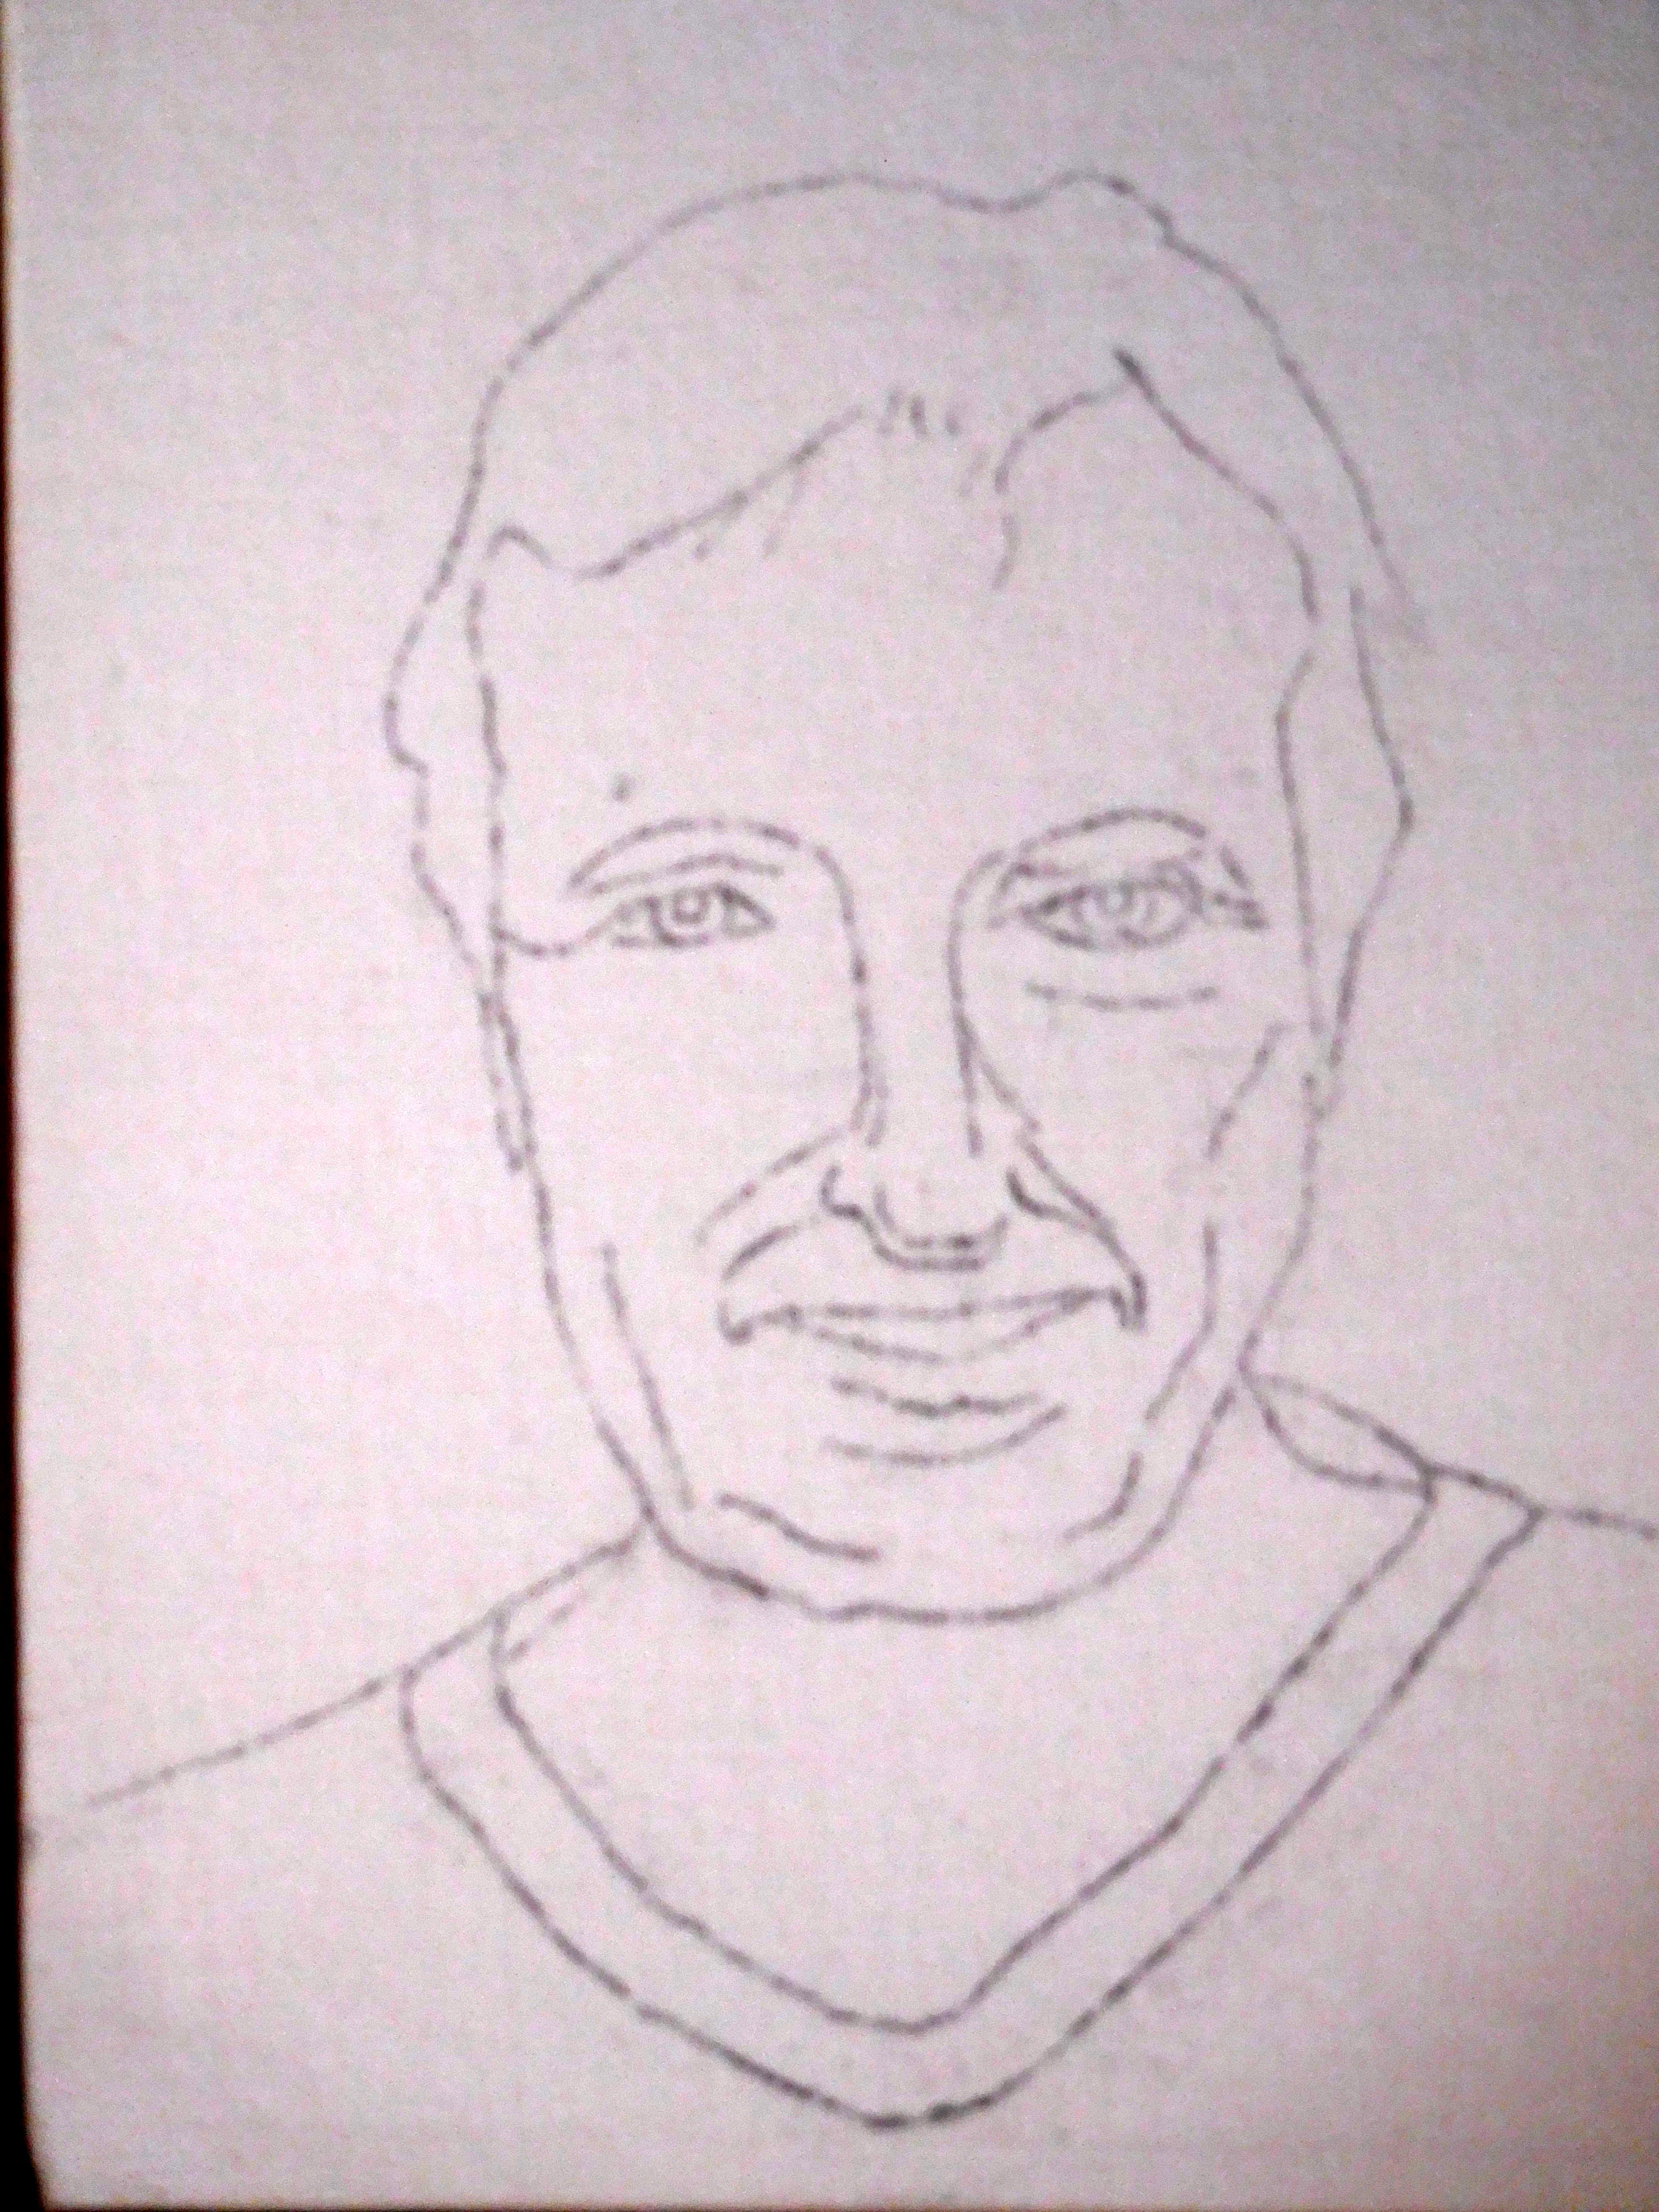
I use a squaring-up program (free from Jackson's) to help me turn a photograph into a tracing on tracing paper. Because the gesso surface of the board is easily marked I then turn the tracing over and go around the lines I've made on the top side with a pencil. The point is only the lines get pencil on the reverse (the side that will be touching the gesso) otherwise the gesso will become a sea of smudges. Then I position the tracing and draw over the original to transfer them to the gesso.
|
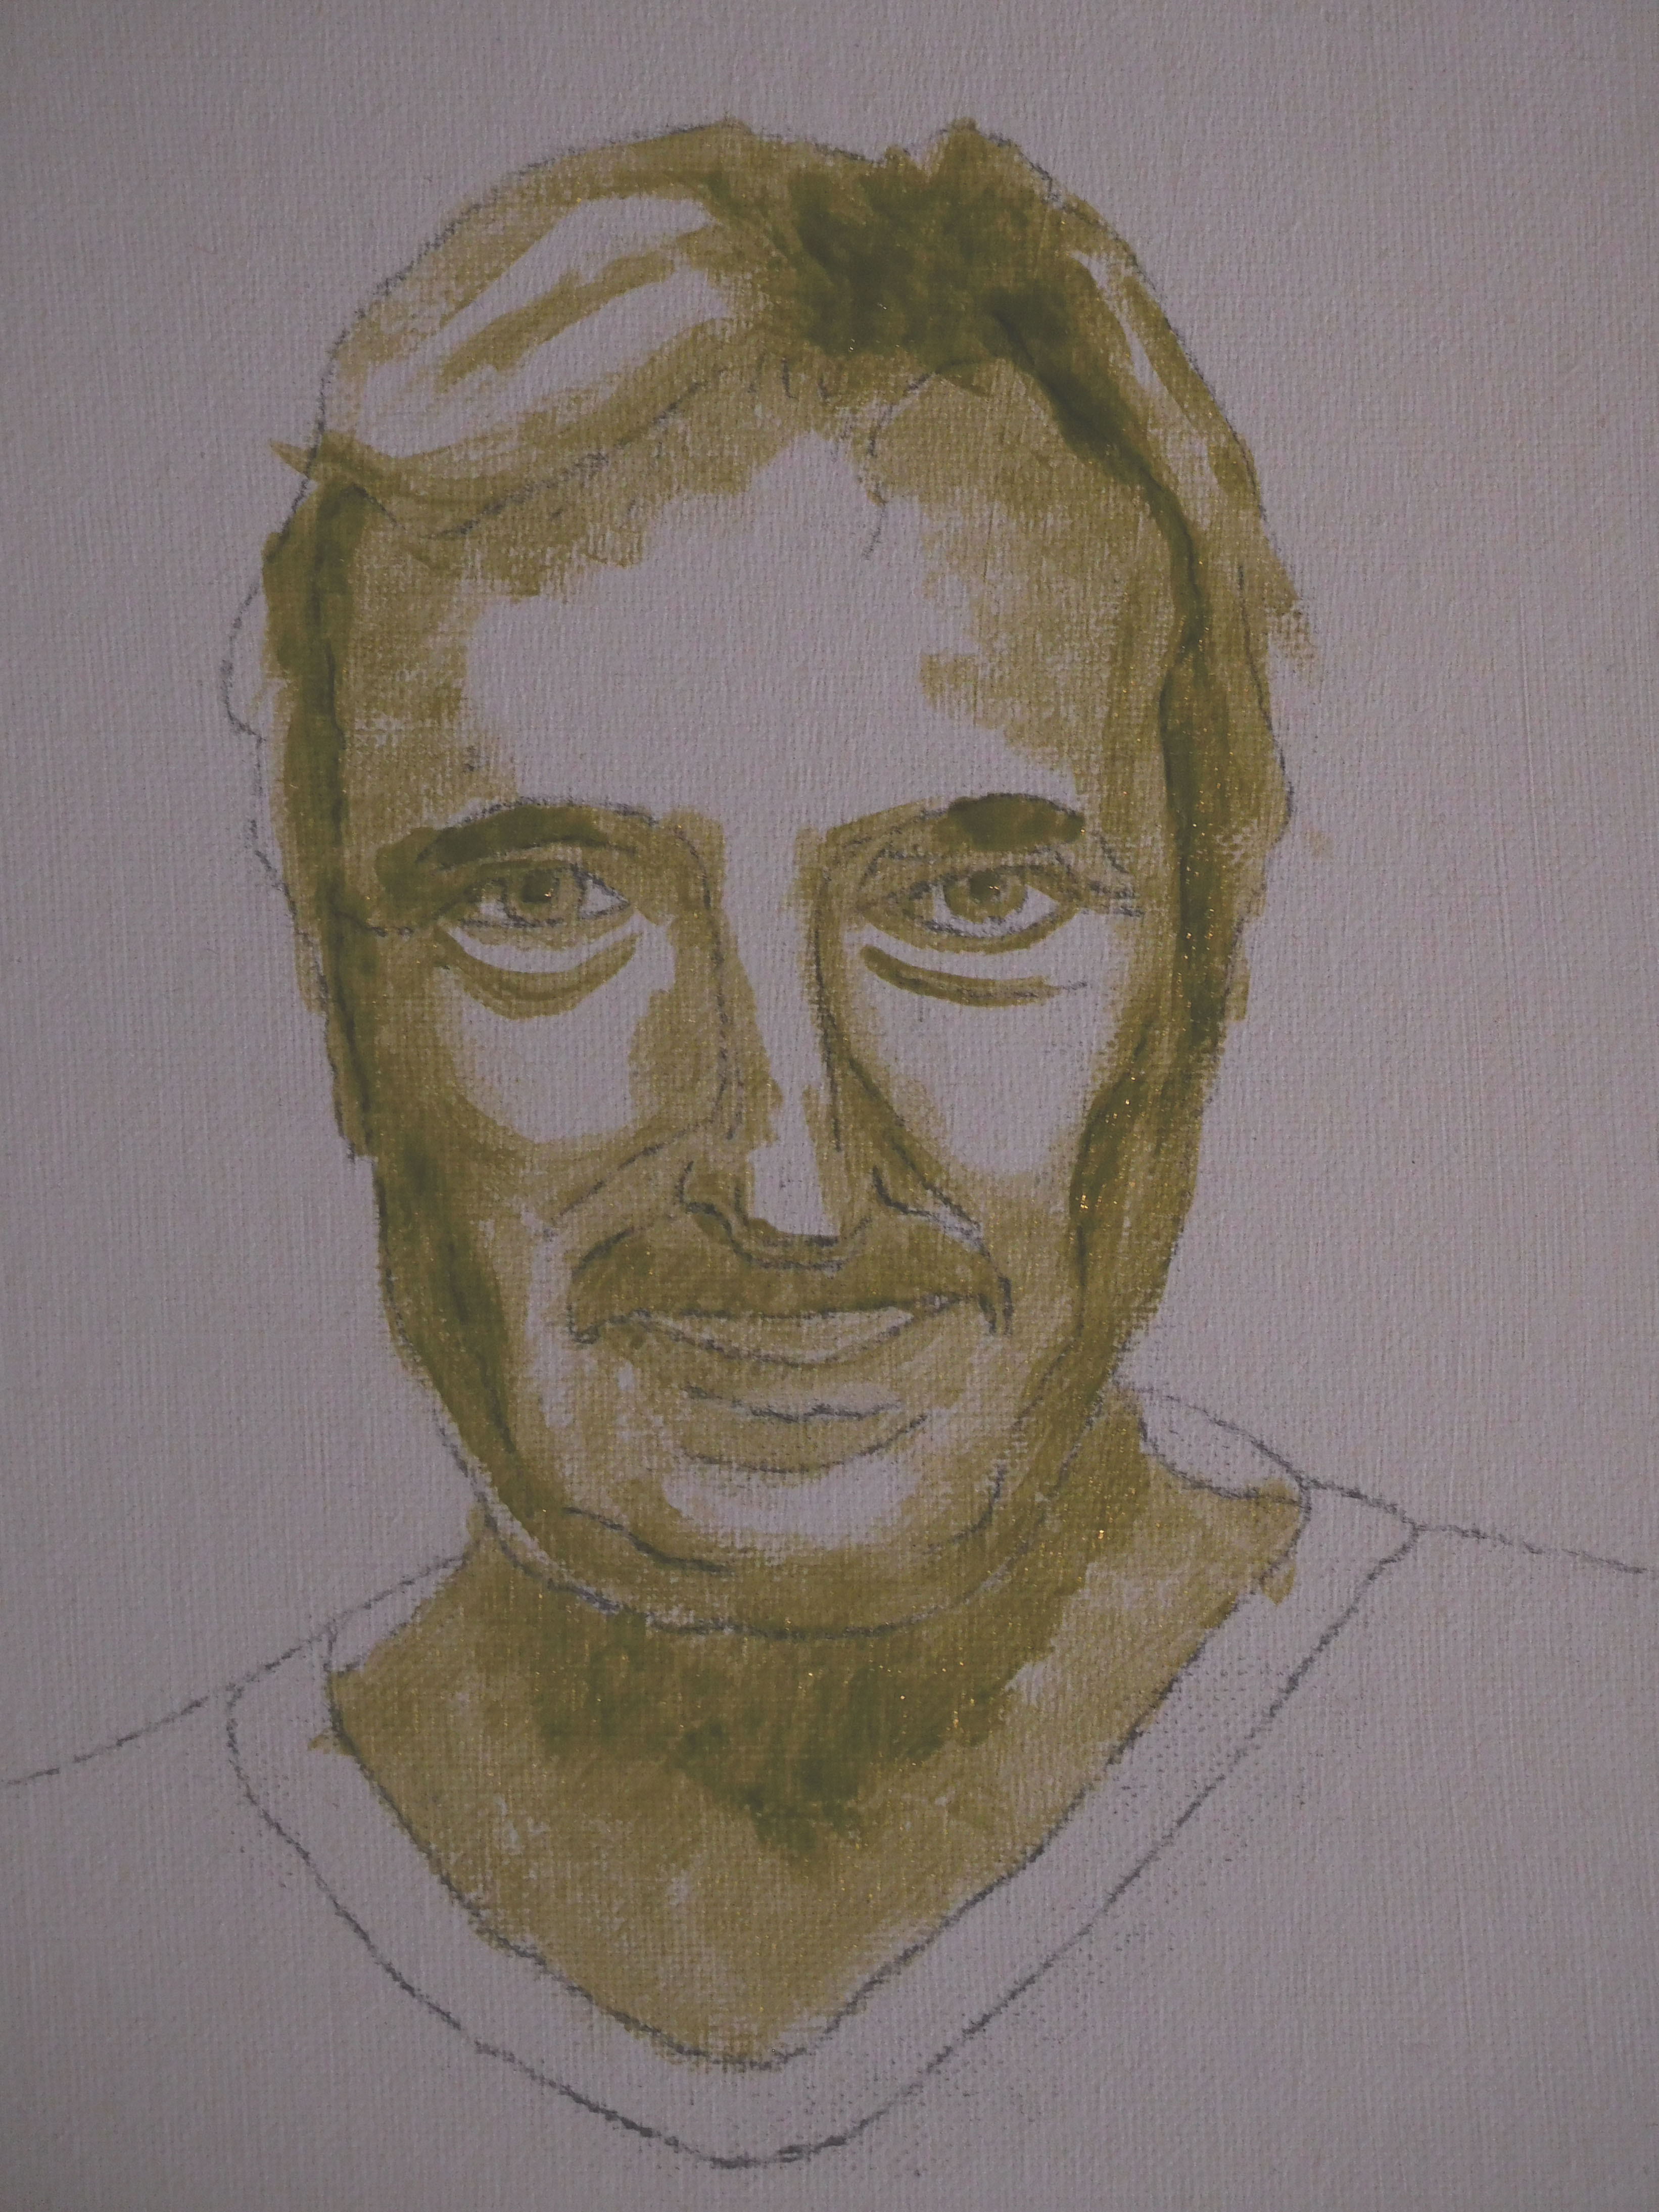
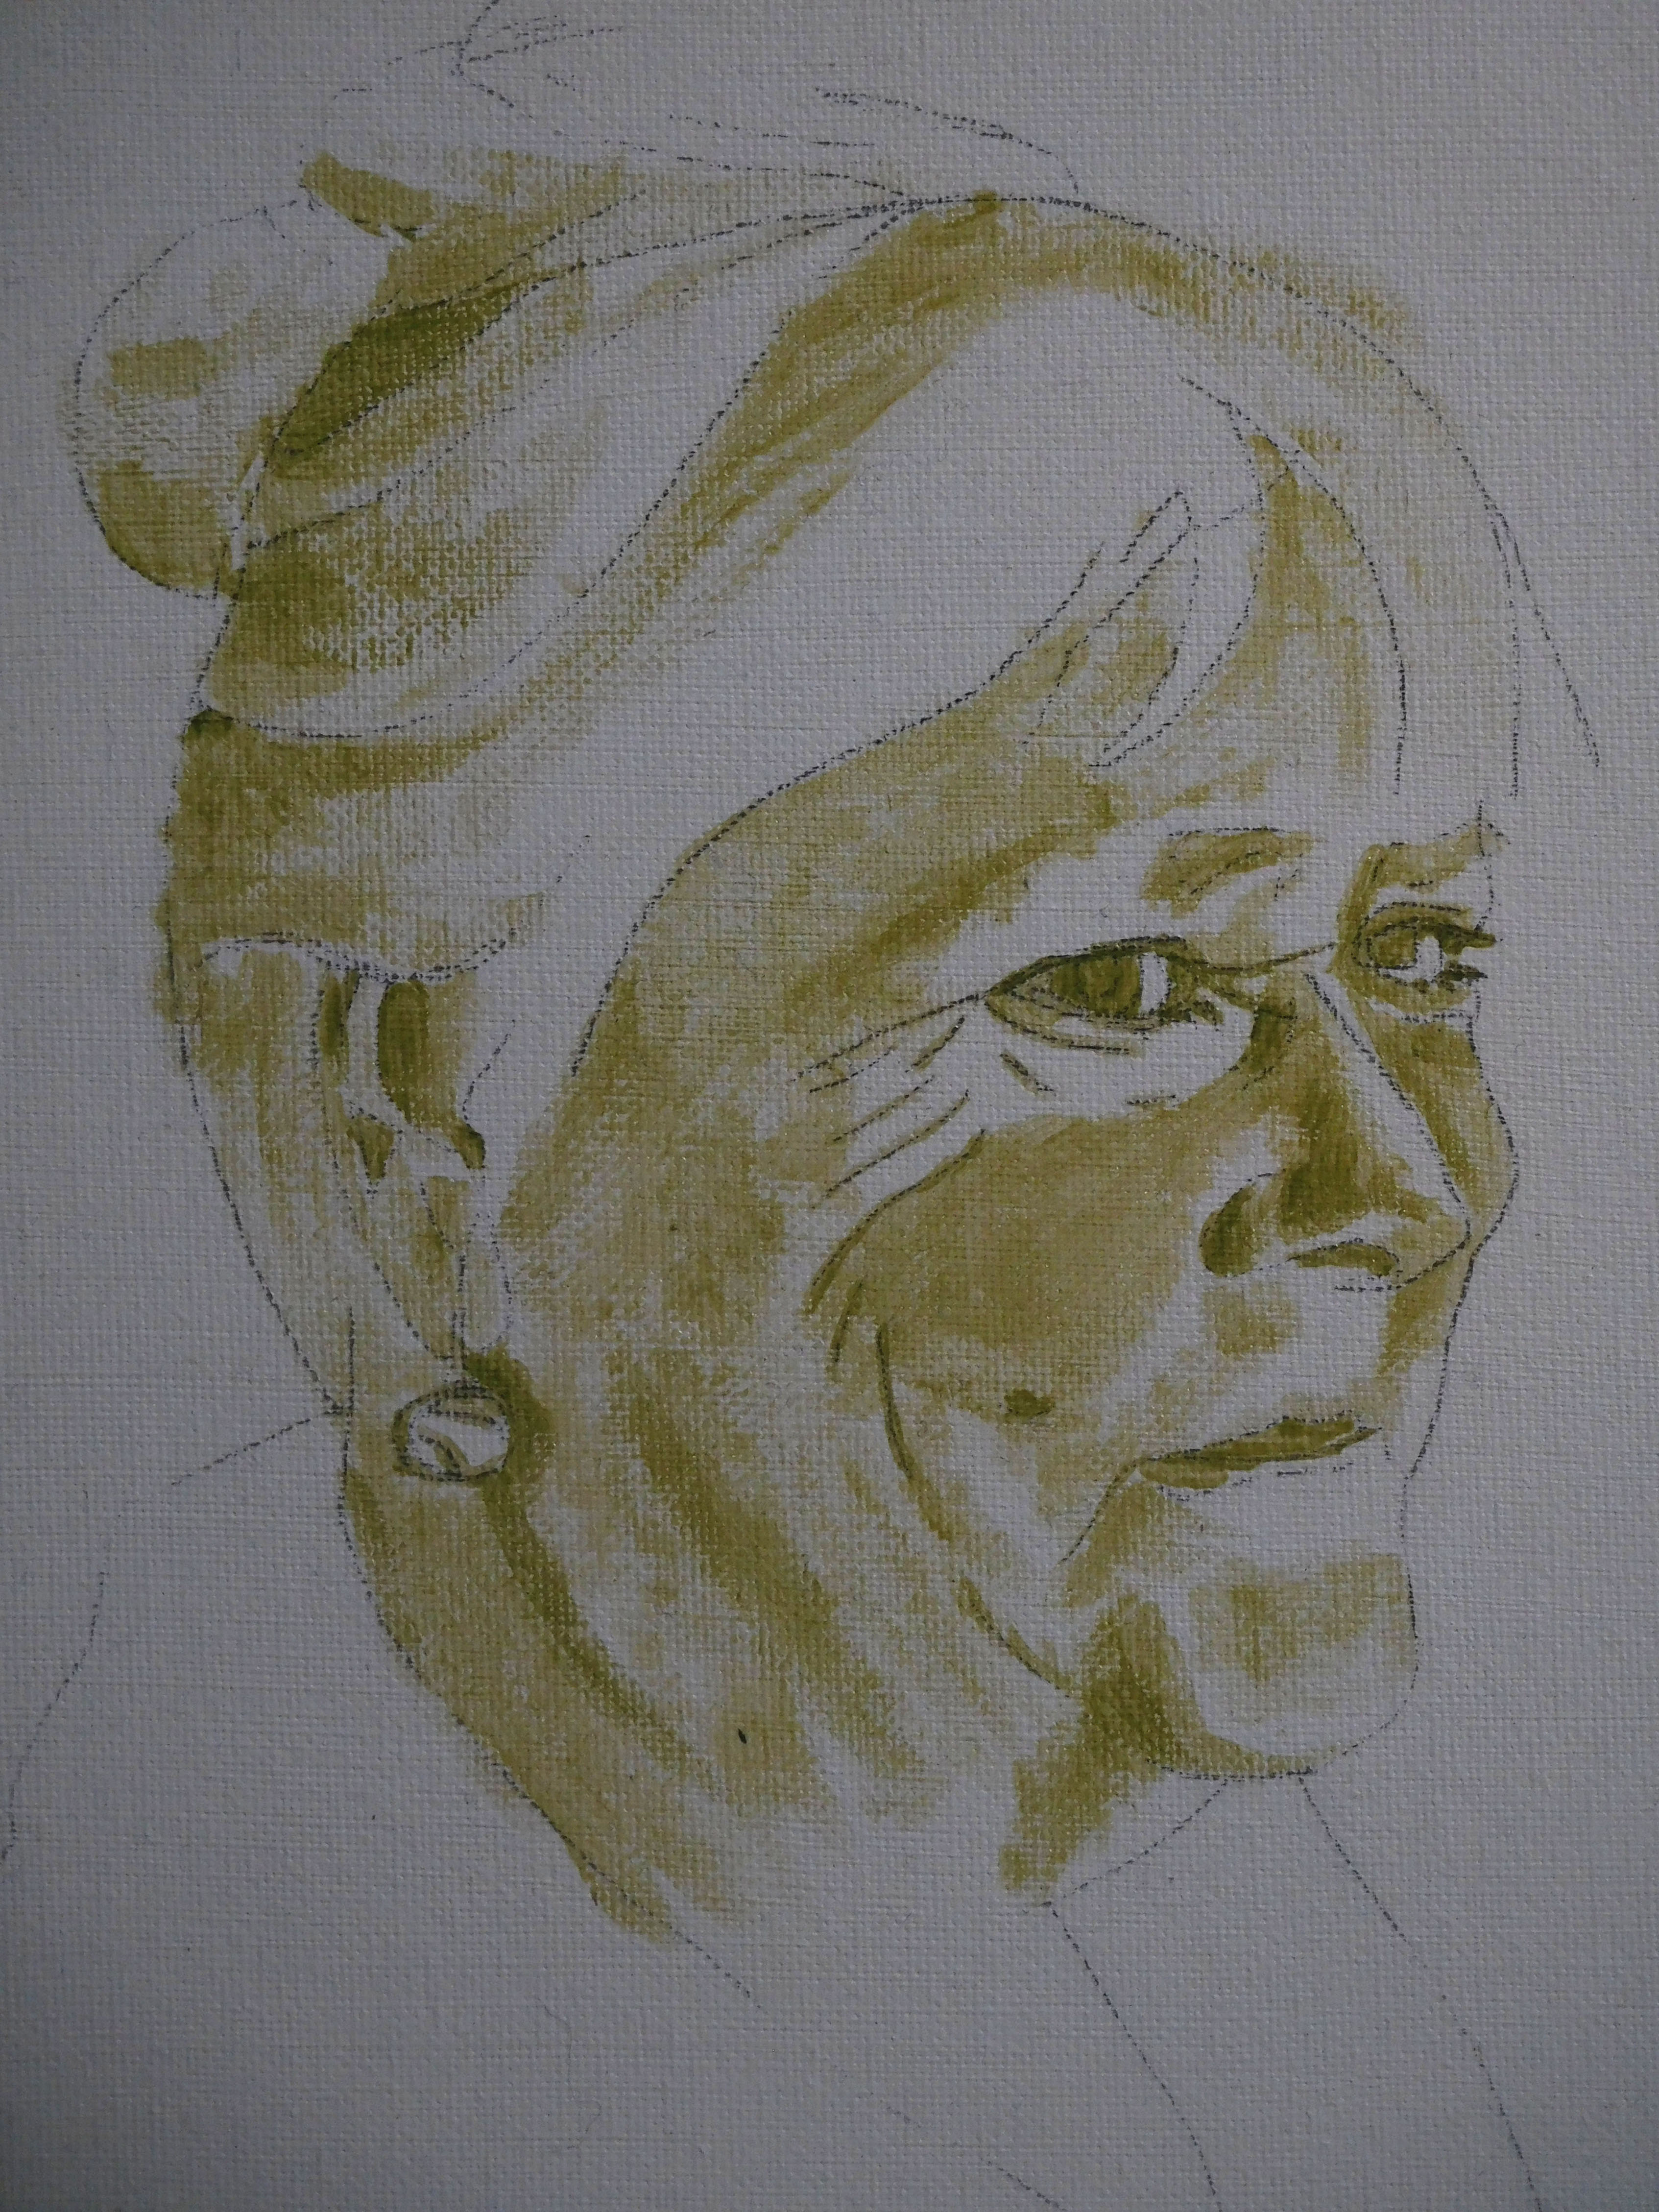
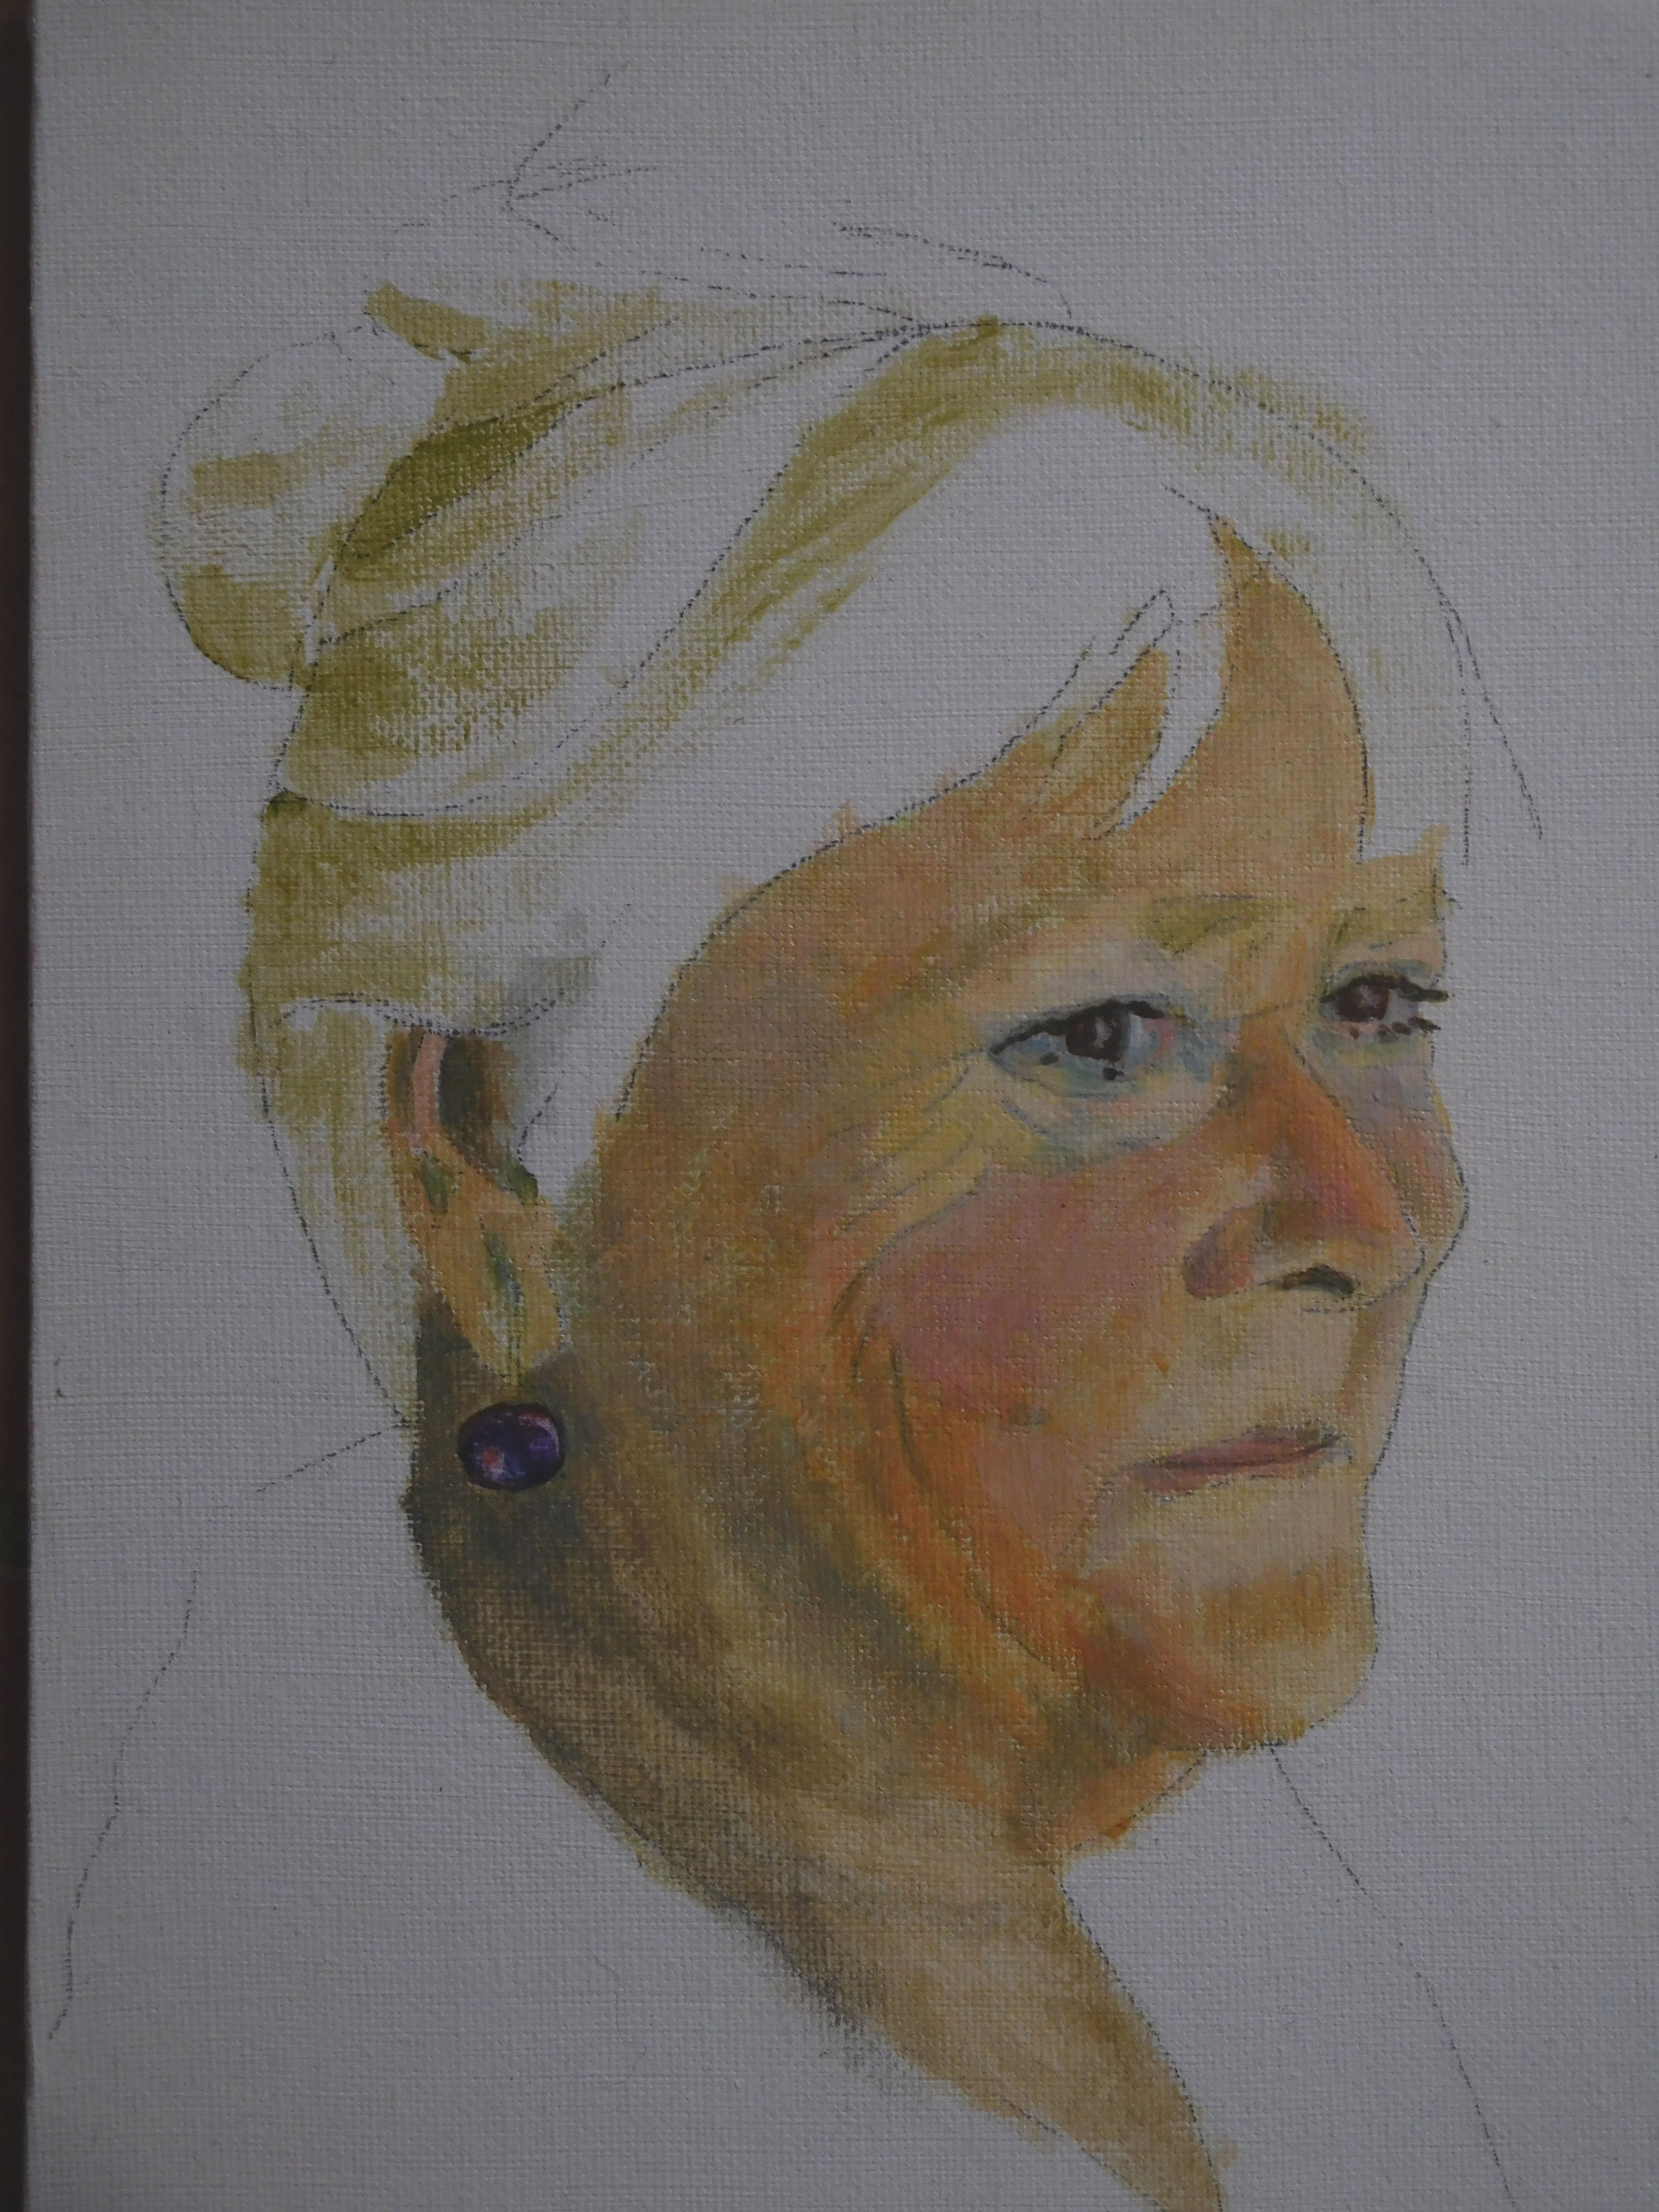
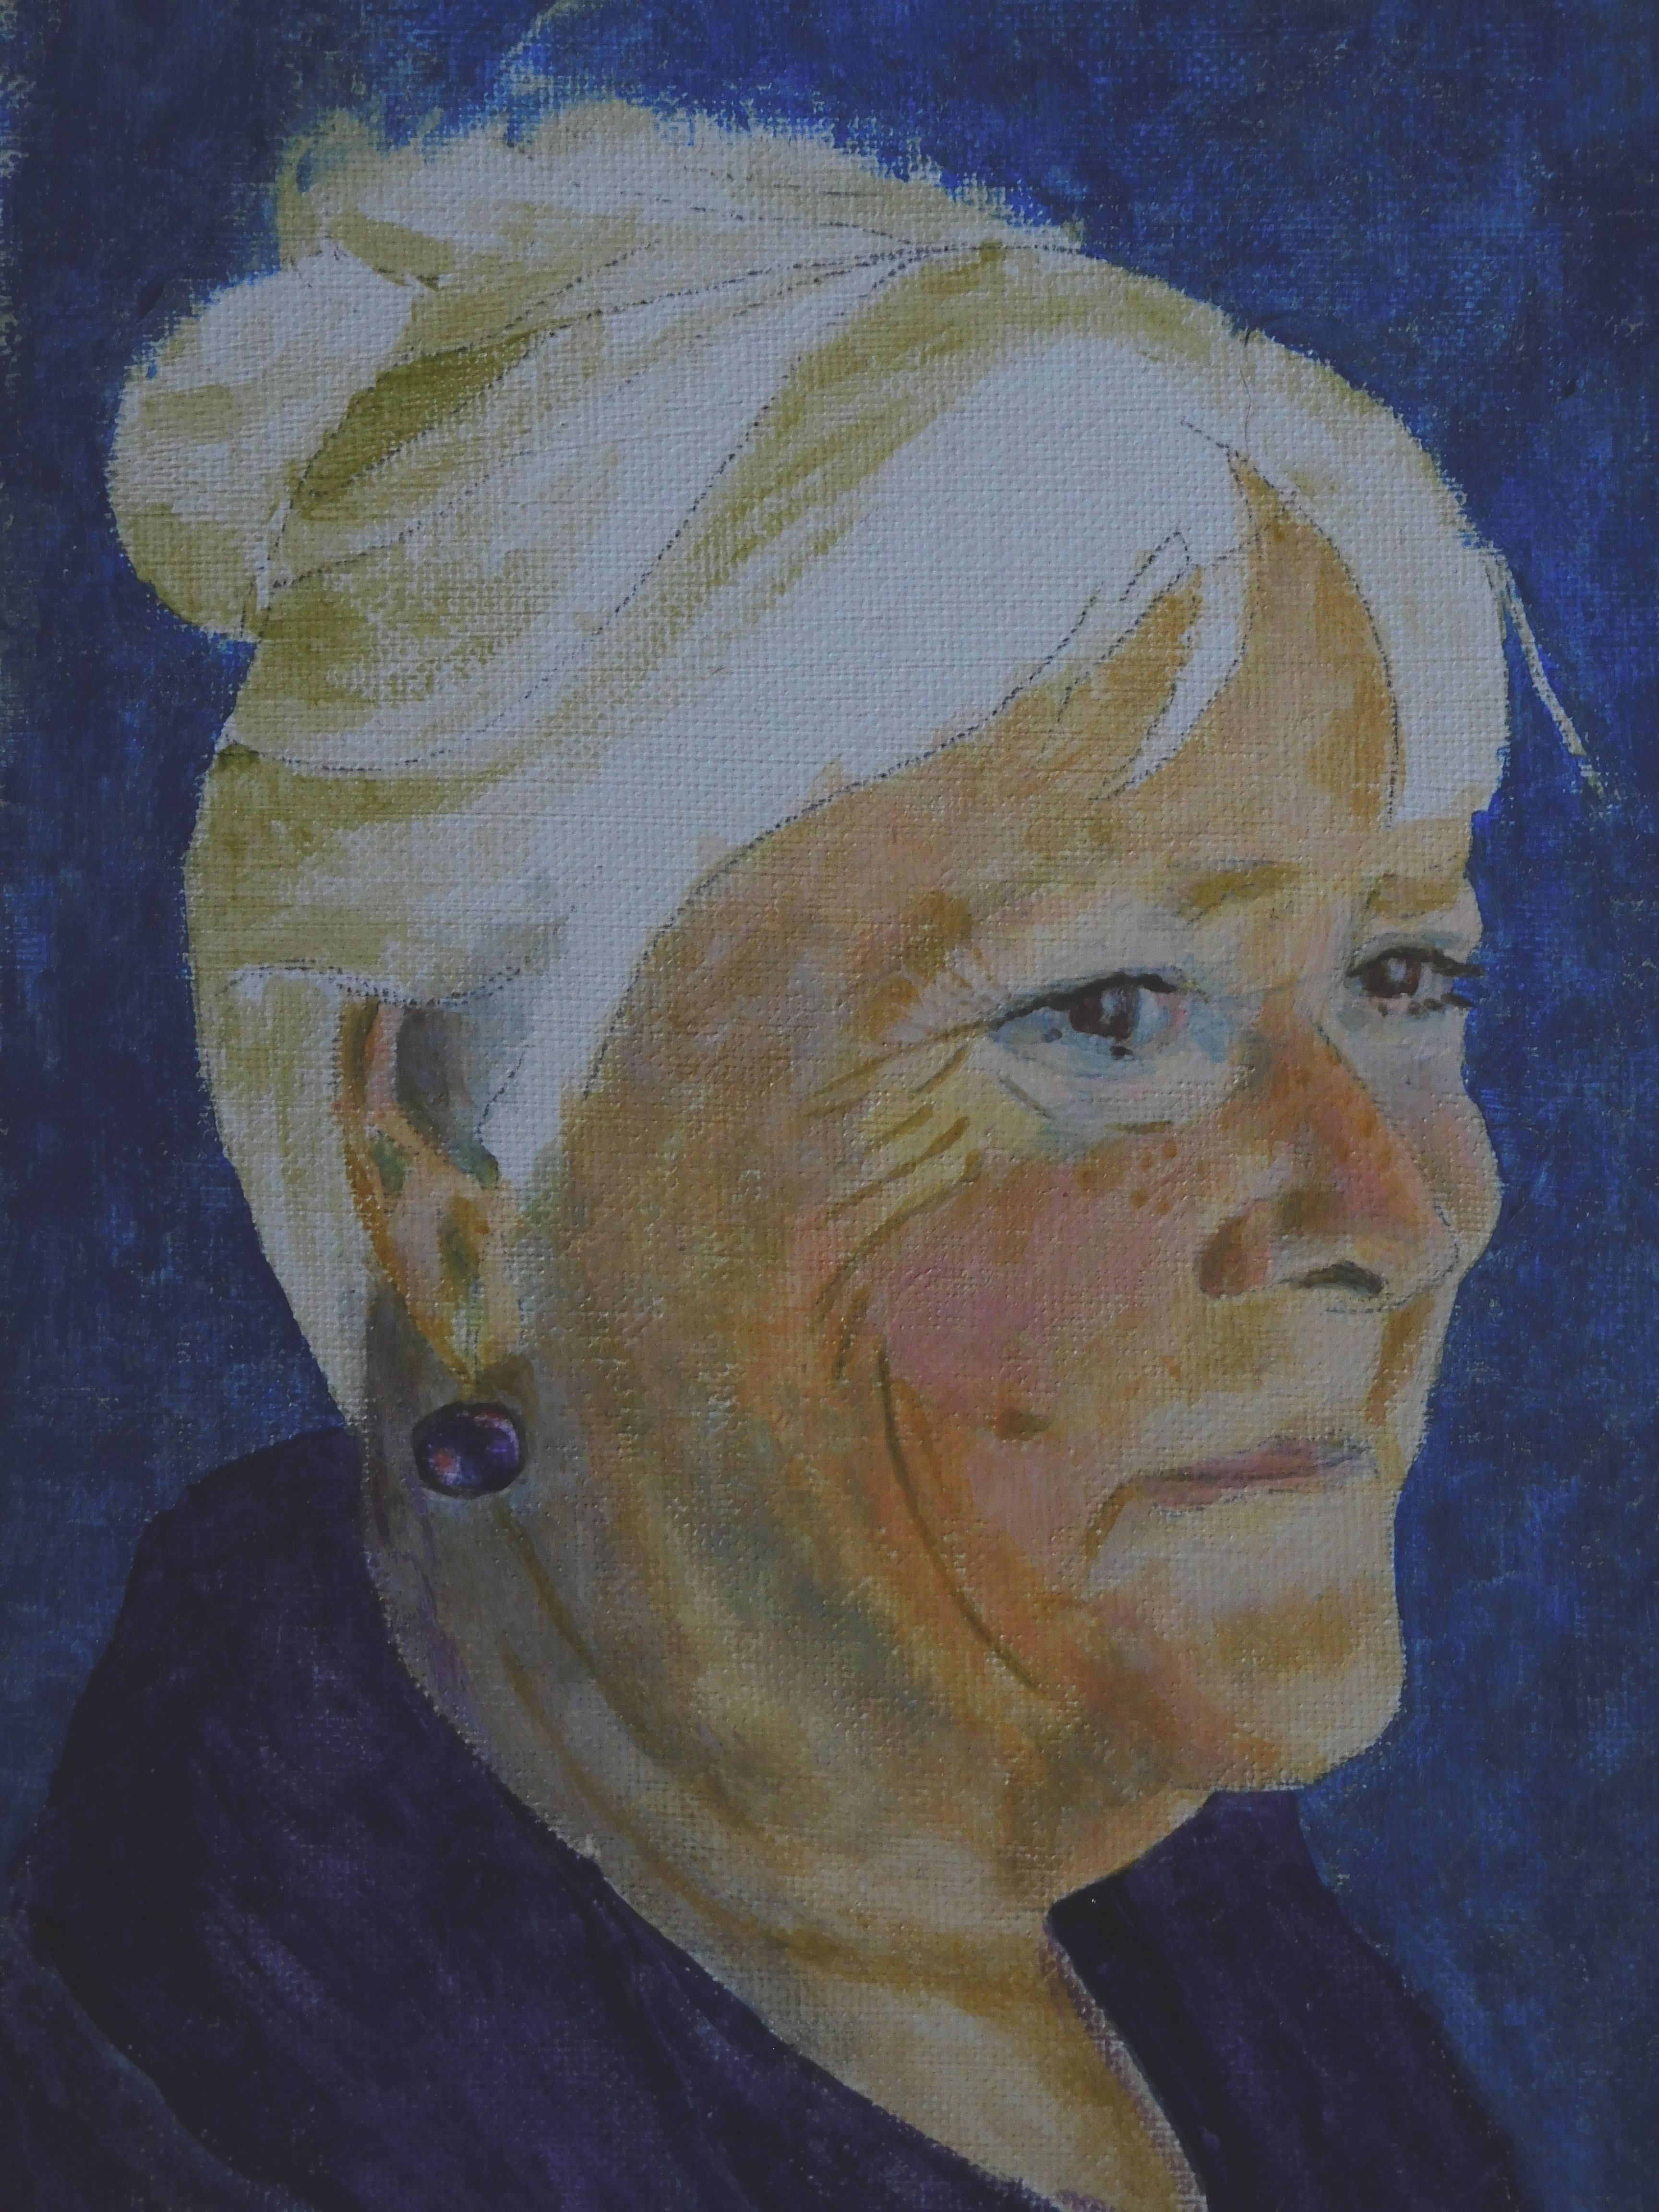
I prime the canvas board with two coats of gesso, any more and it never seems to dry, which take a week or so to dry thoroughly. Once I've copied the image I can get the paints out. Remembering that every brush stroke will be seen on the final image I start with a tonal sketch in green (Terre Verde or Sap green). Corrections are almost impossible so it's important to get this right.
|
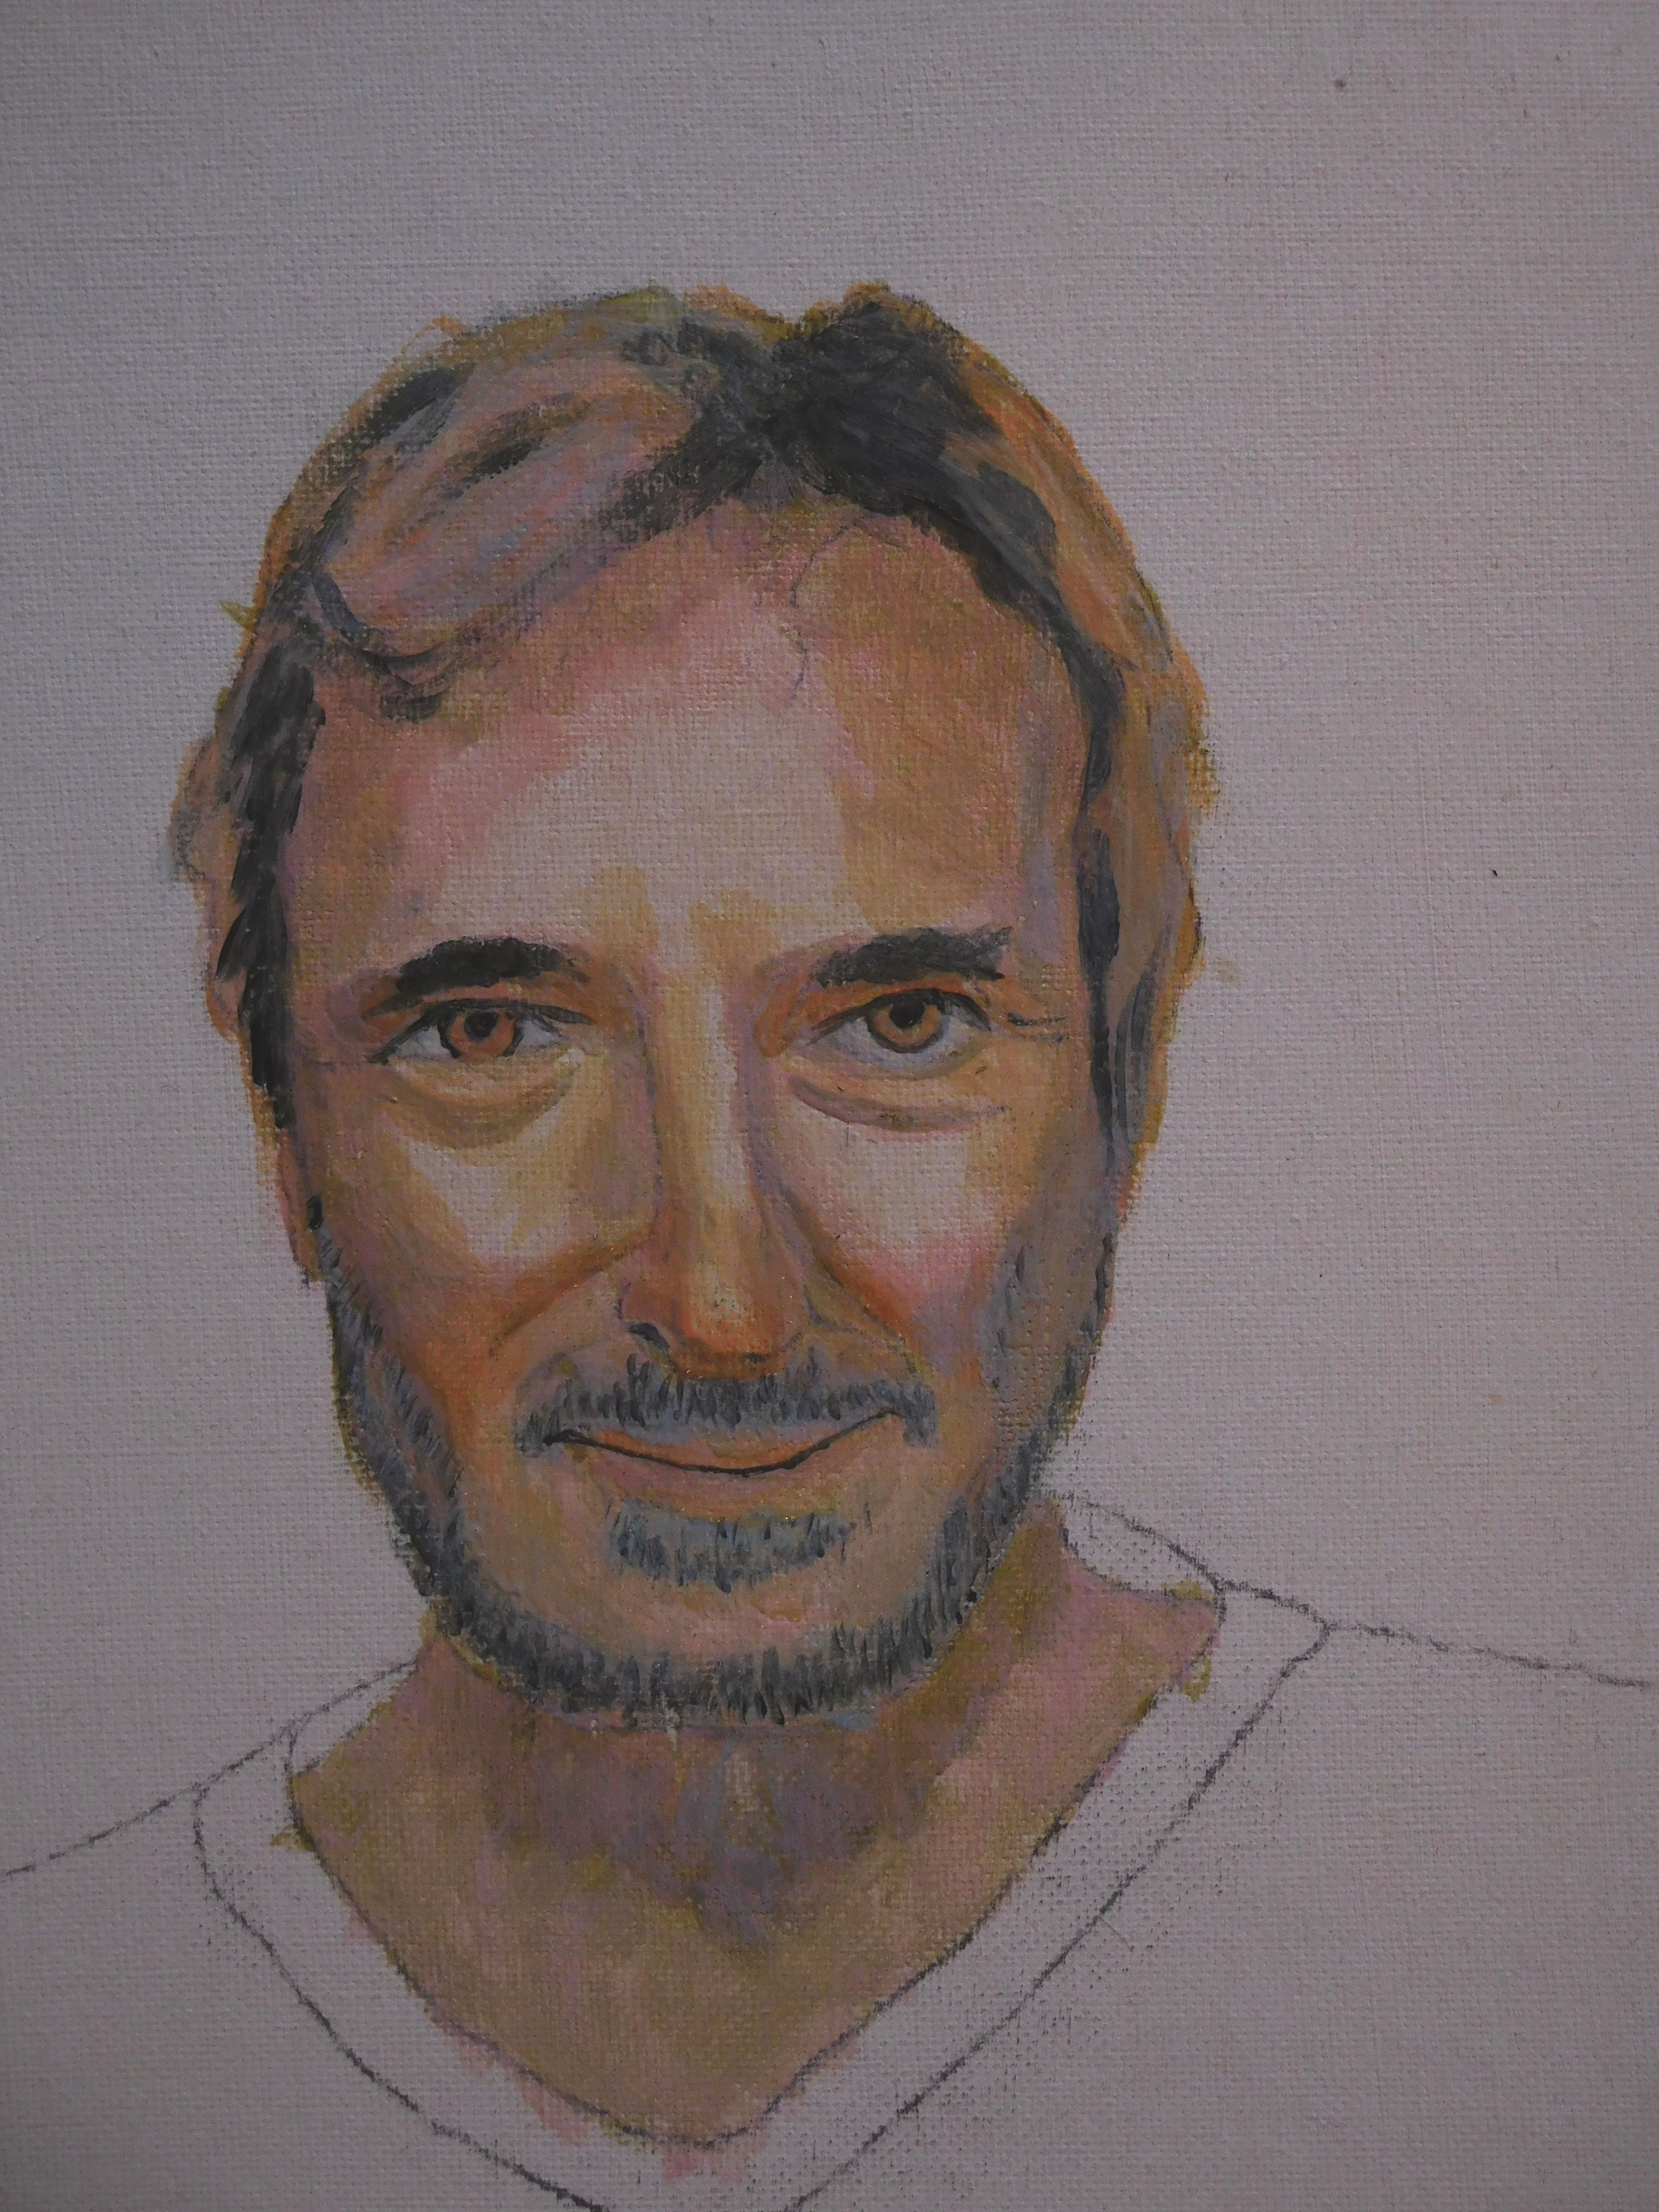
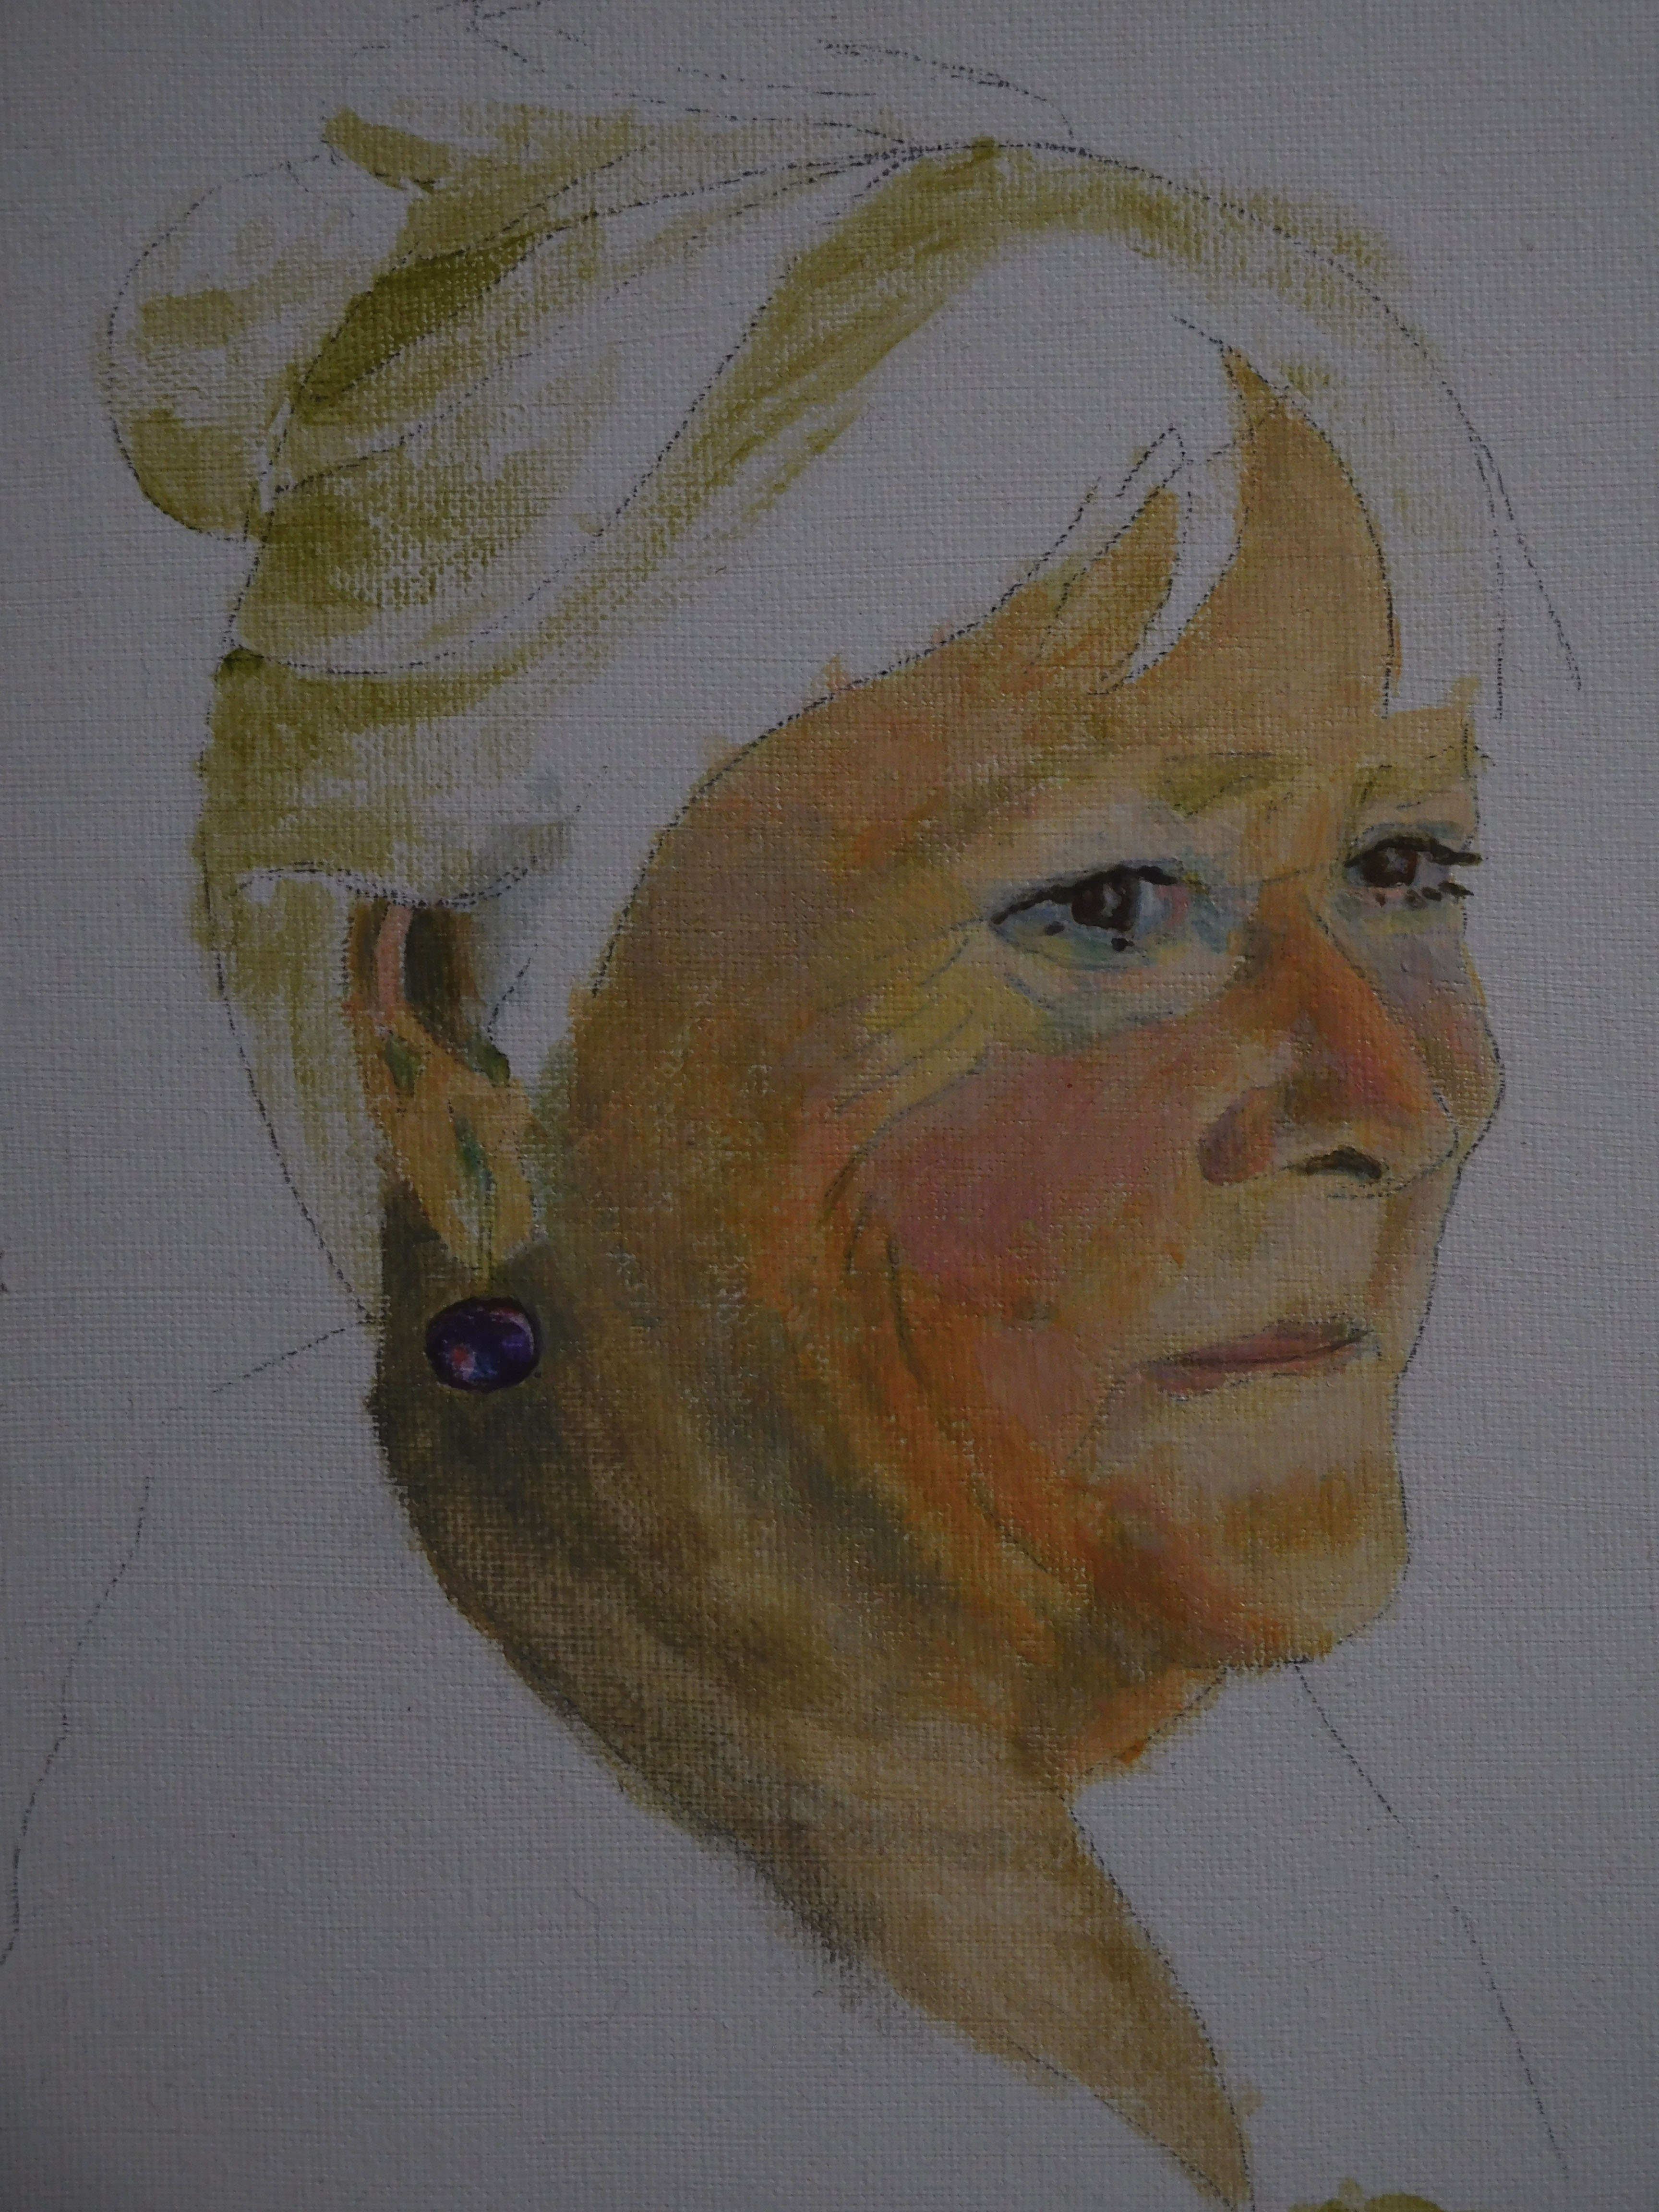
Then I can add small areas of colour to the underlying green pigment which reduces the boldness of the skin tones. If you're going to try this technique I recommend playing with your paints to discover which combination of coloured glazes will make the colours and tones you are aiming for. It's relatively easy to darken areas by overlaying them whereas lightening areas is almost impossible. For example the irises of the eyes at this stage are lighter than the finished version shown next.
|
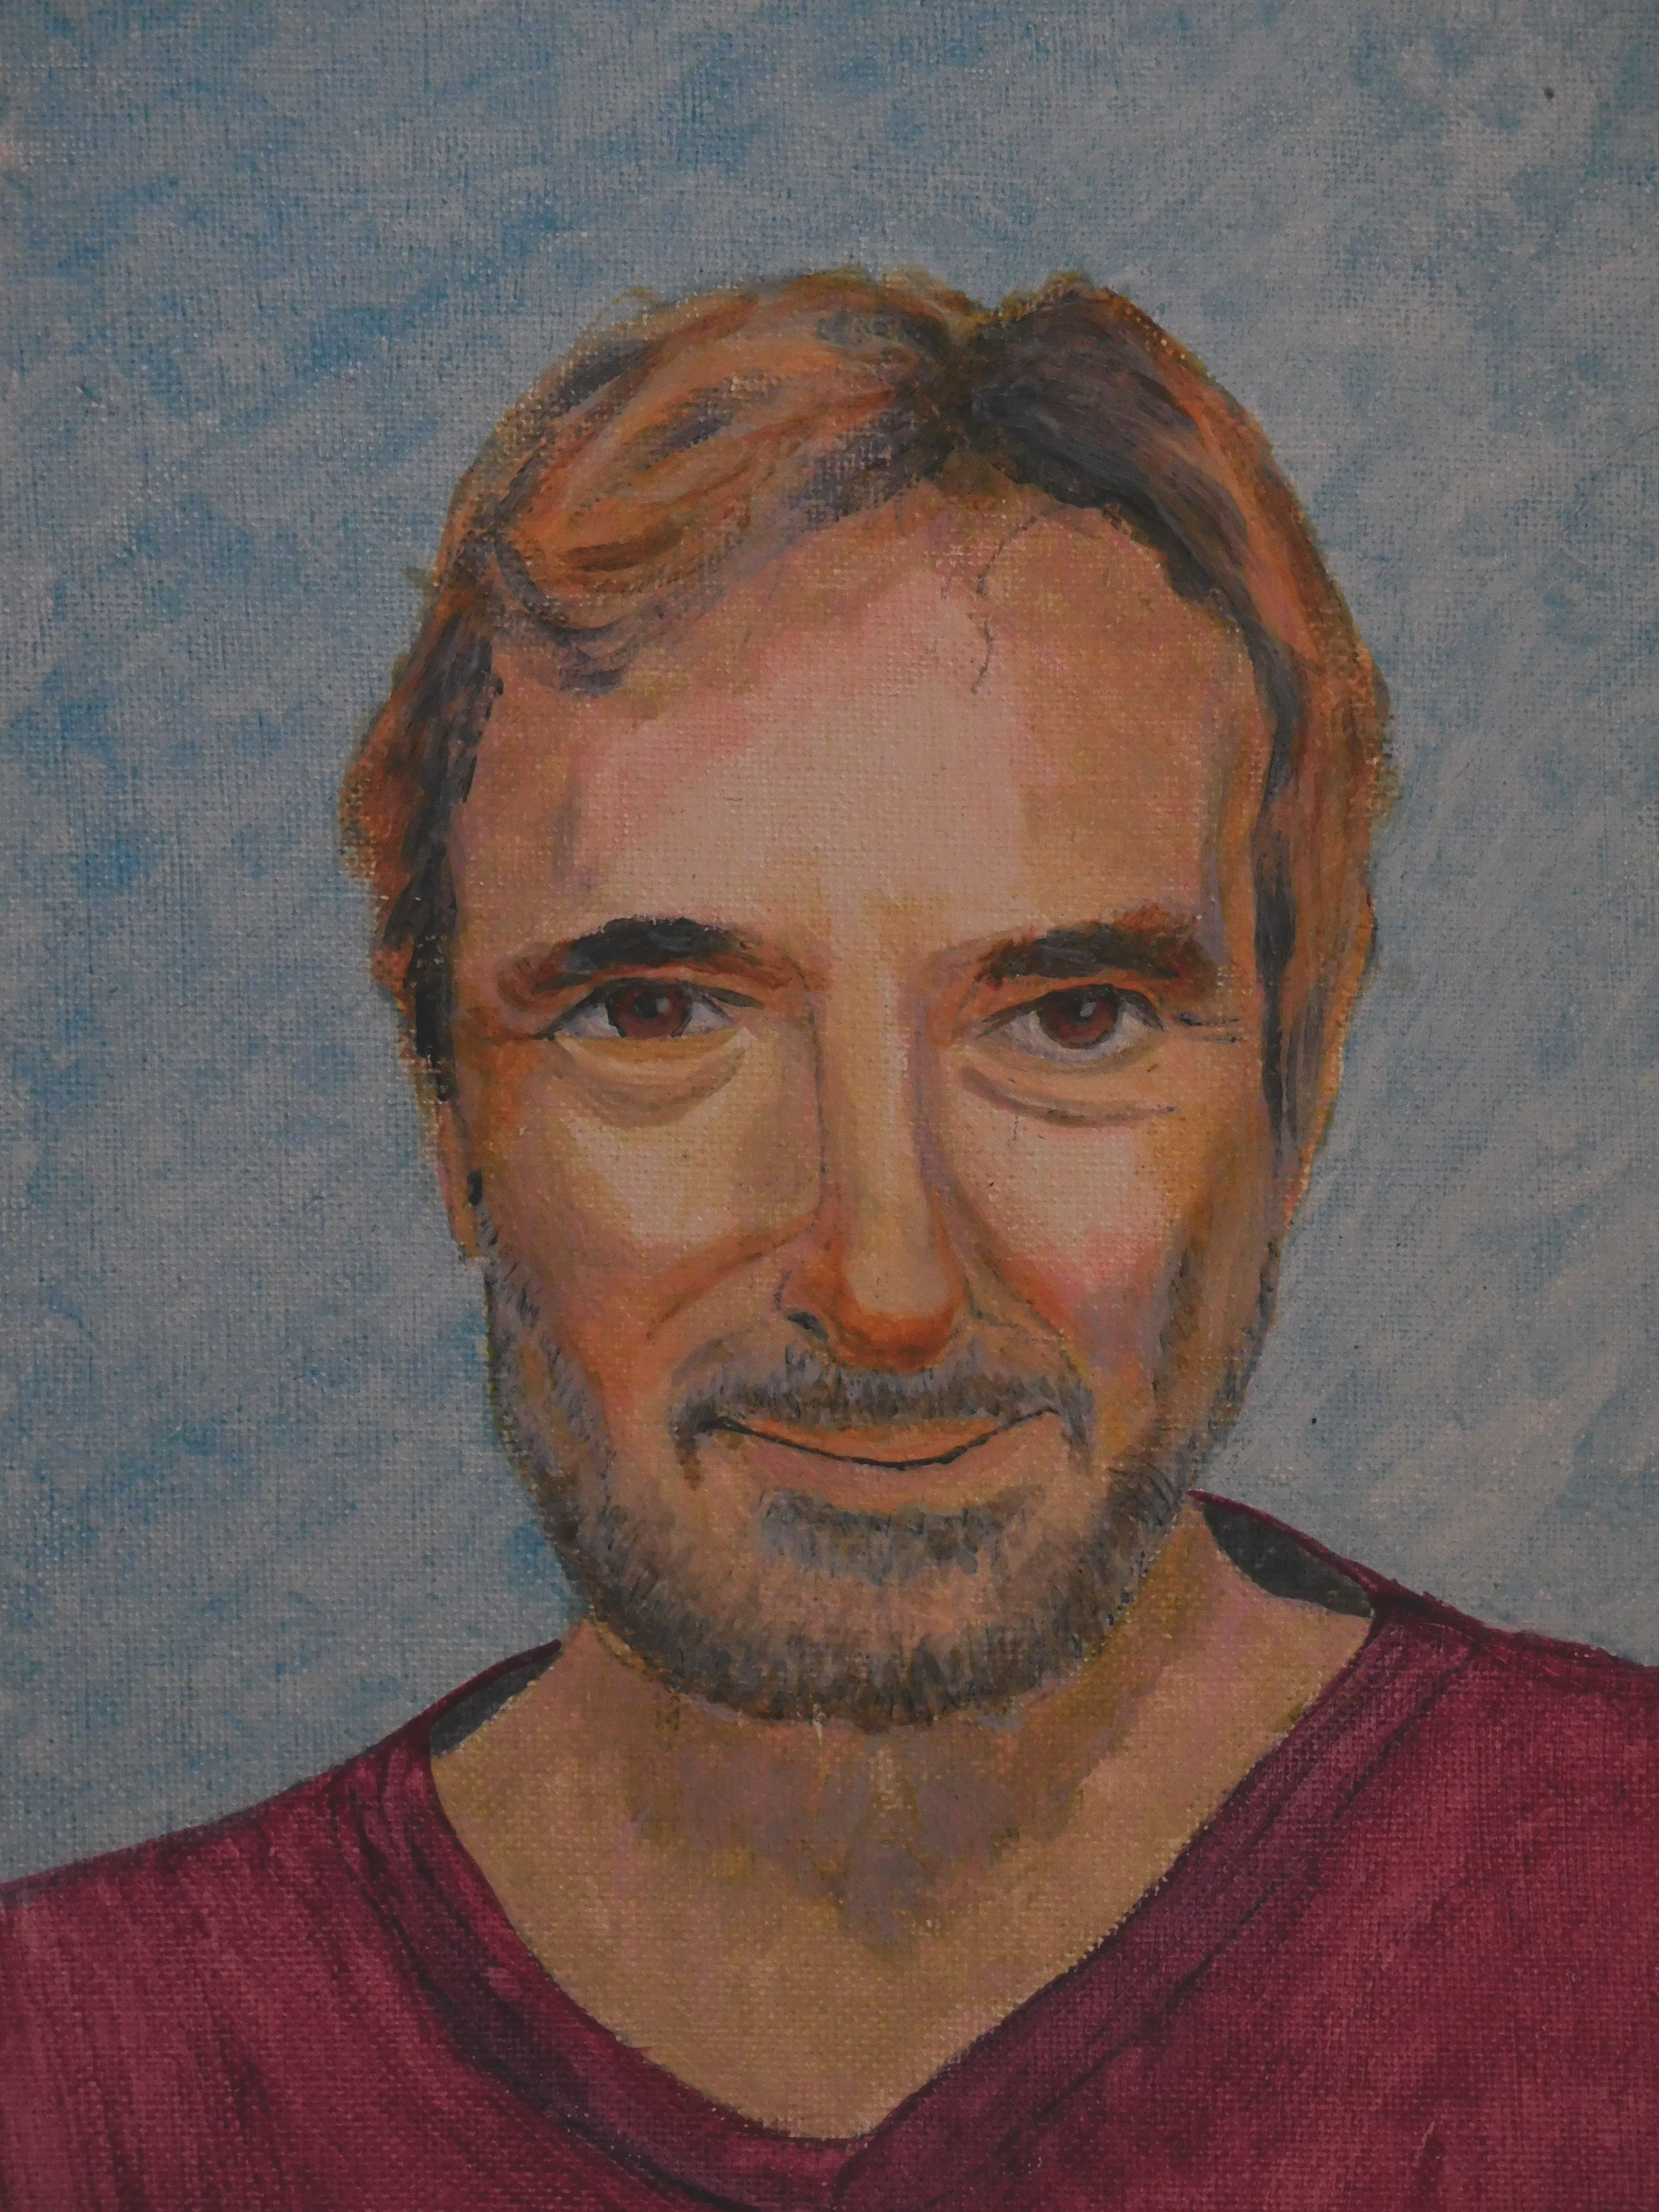
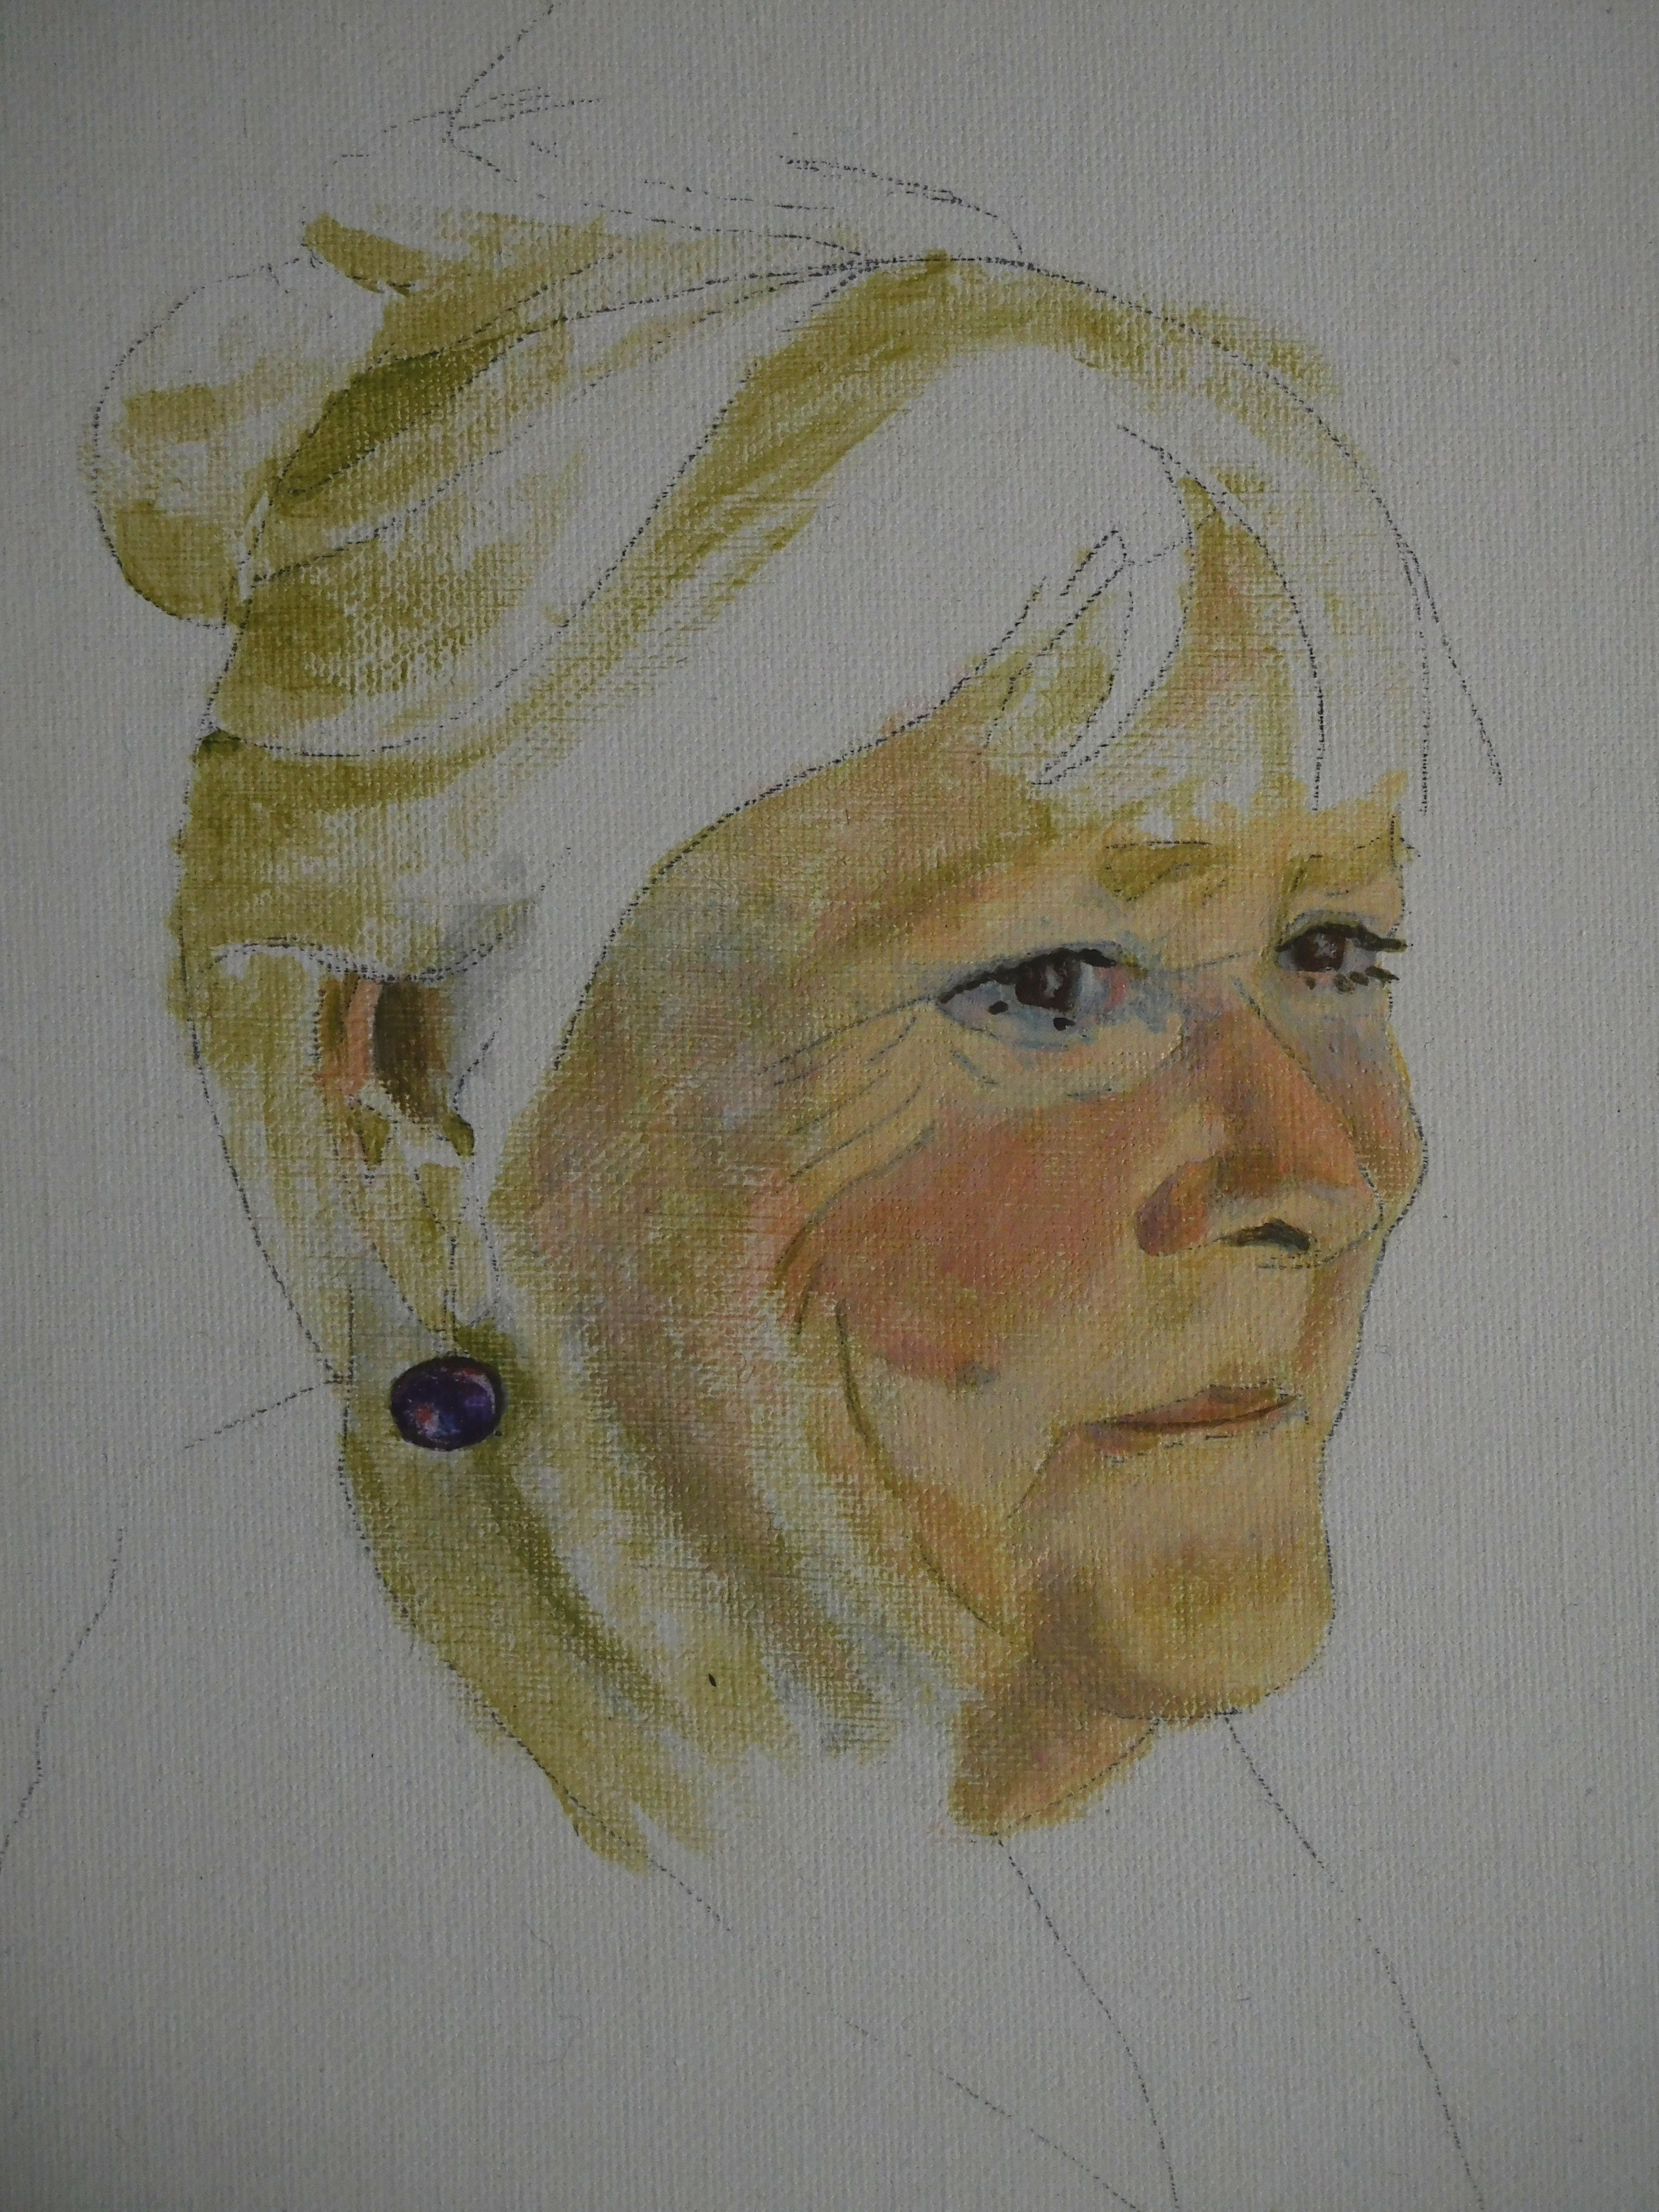
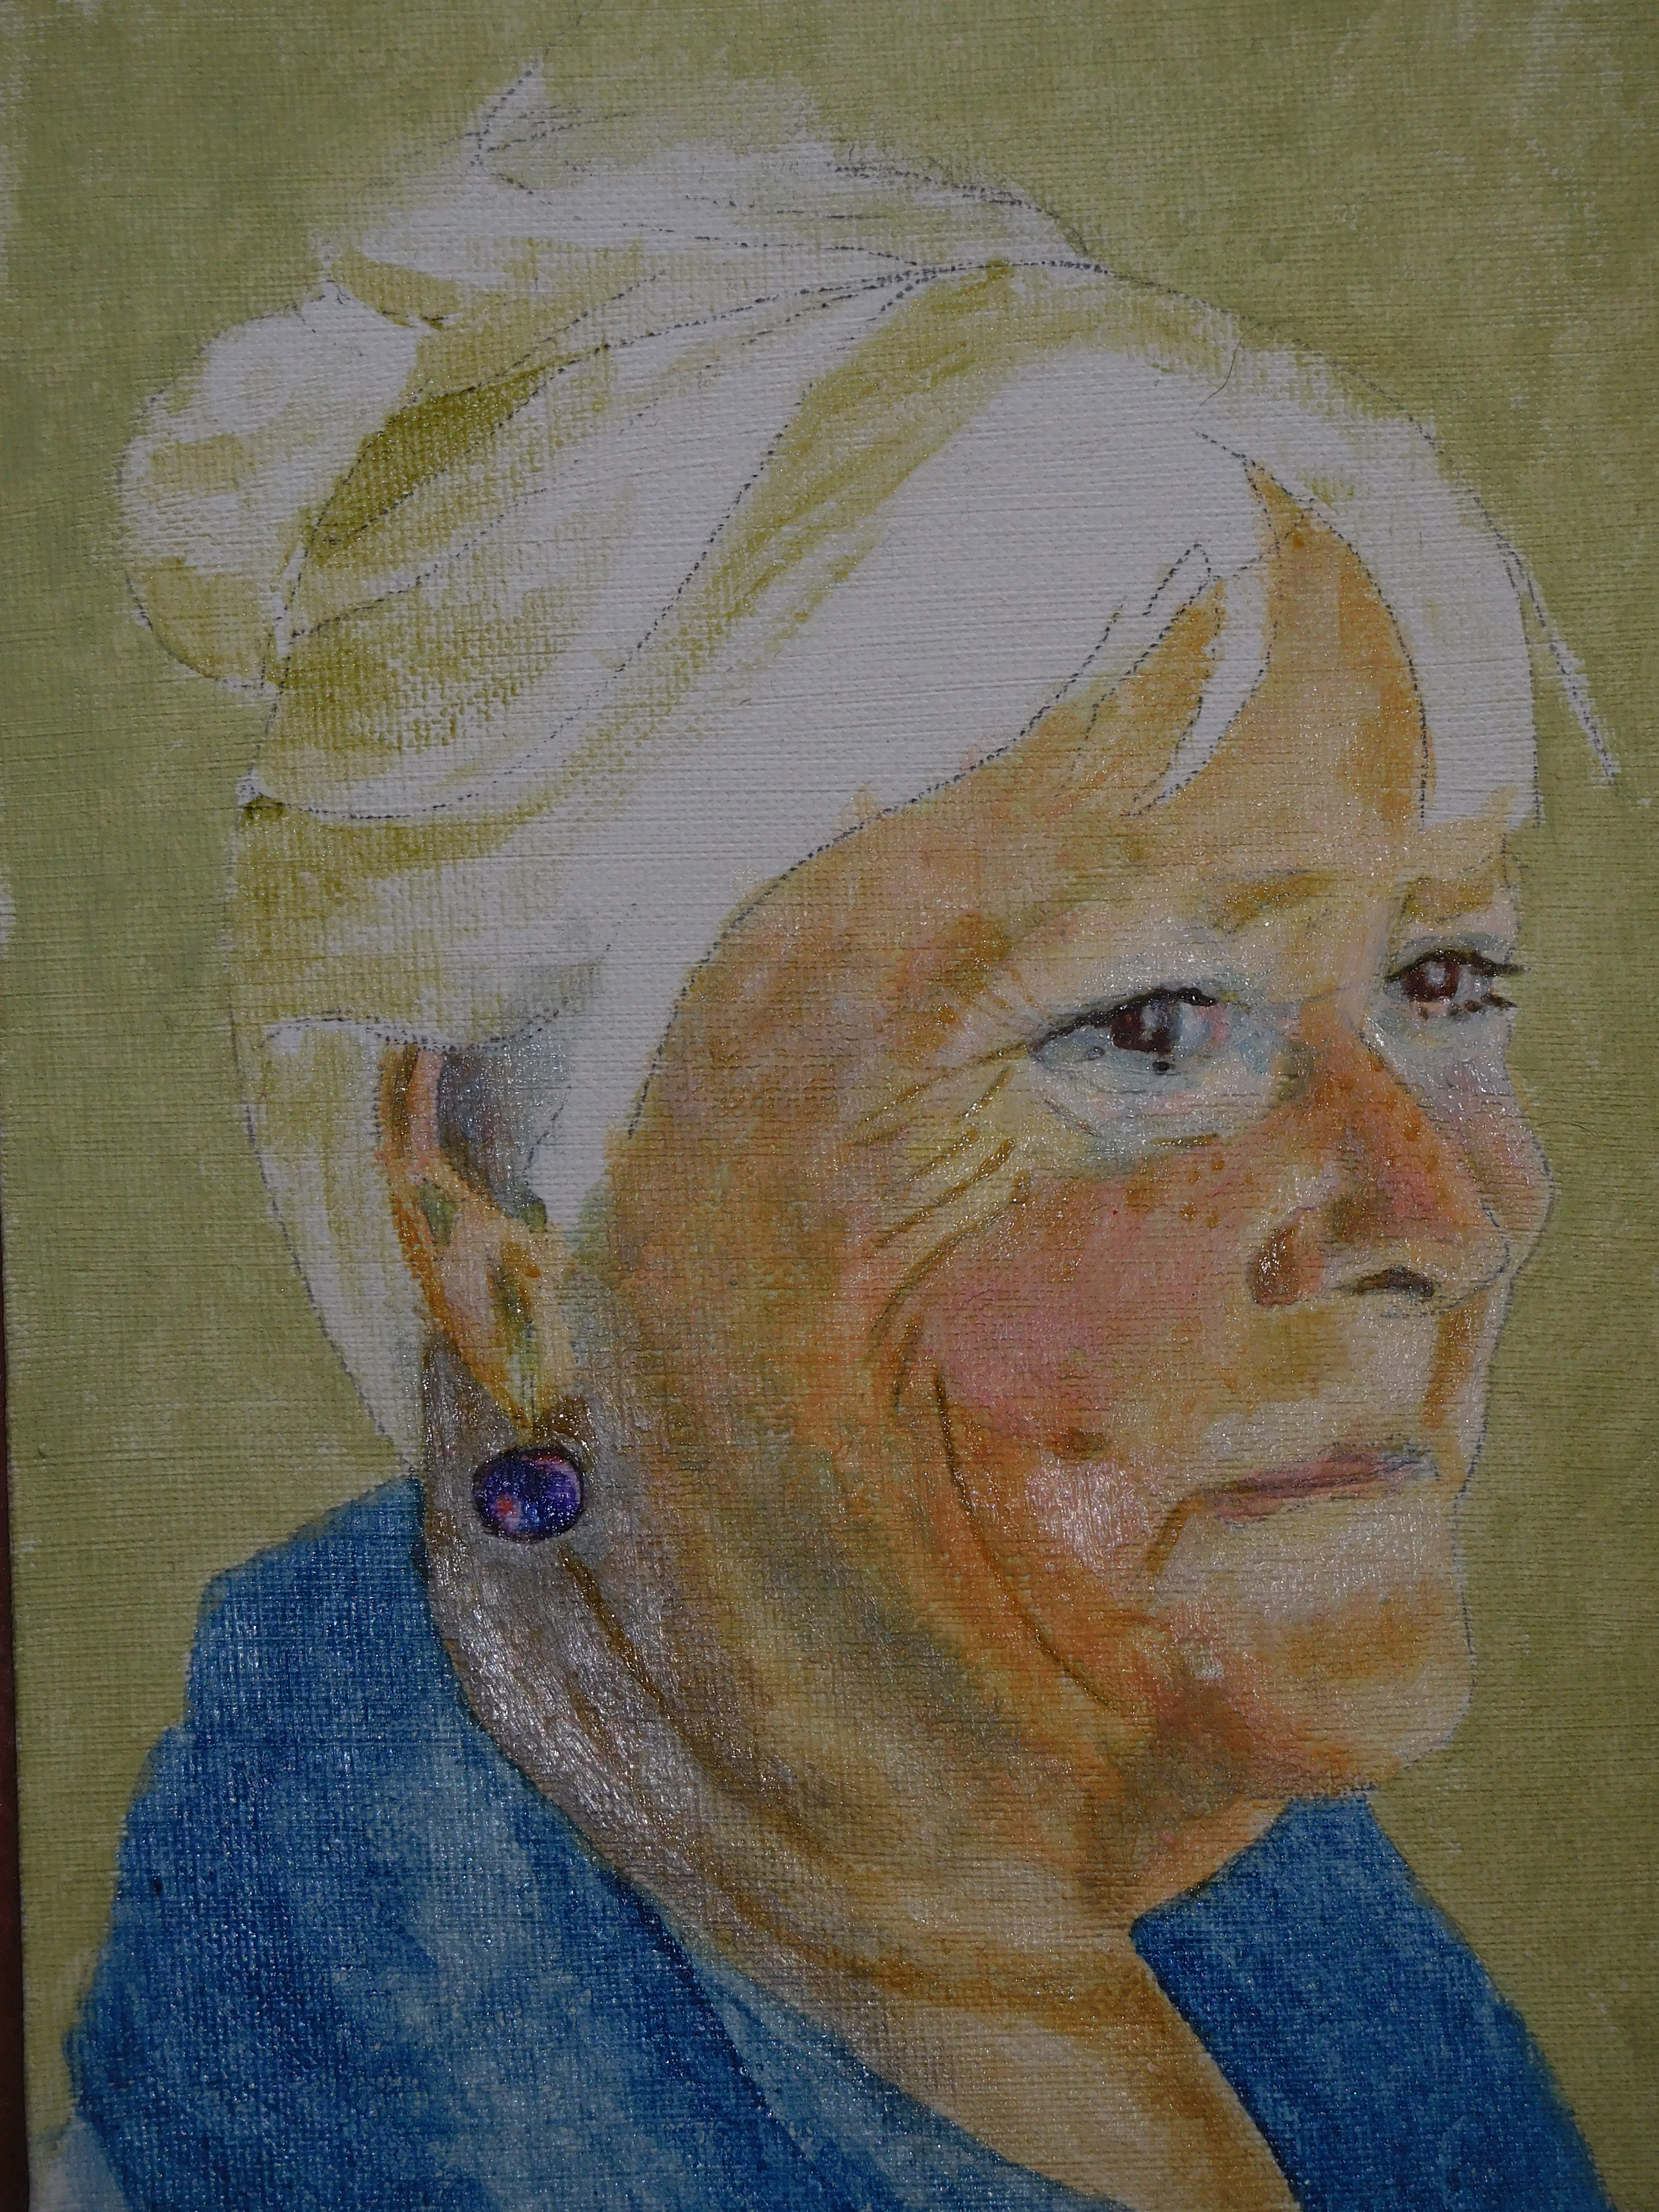
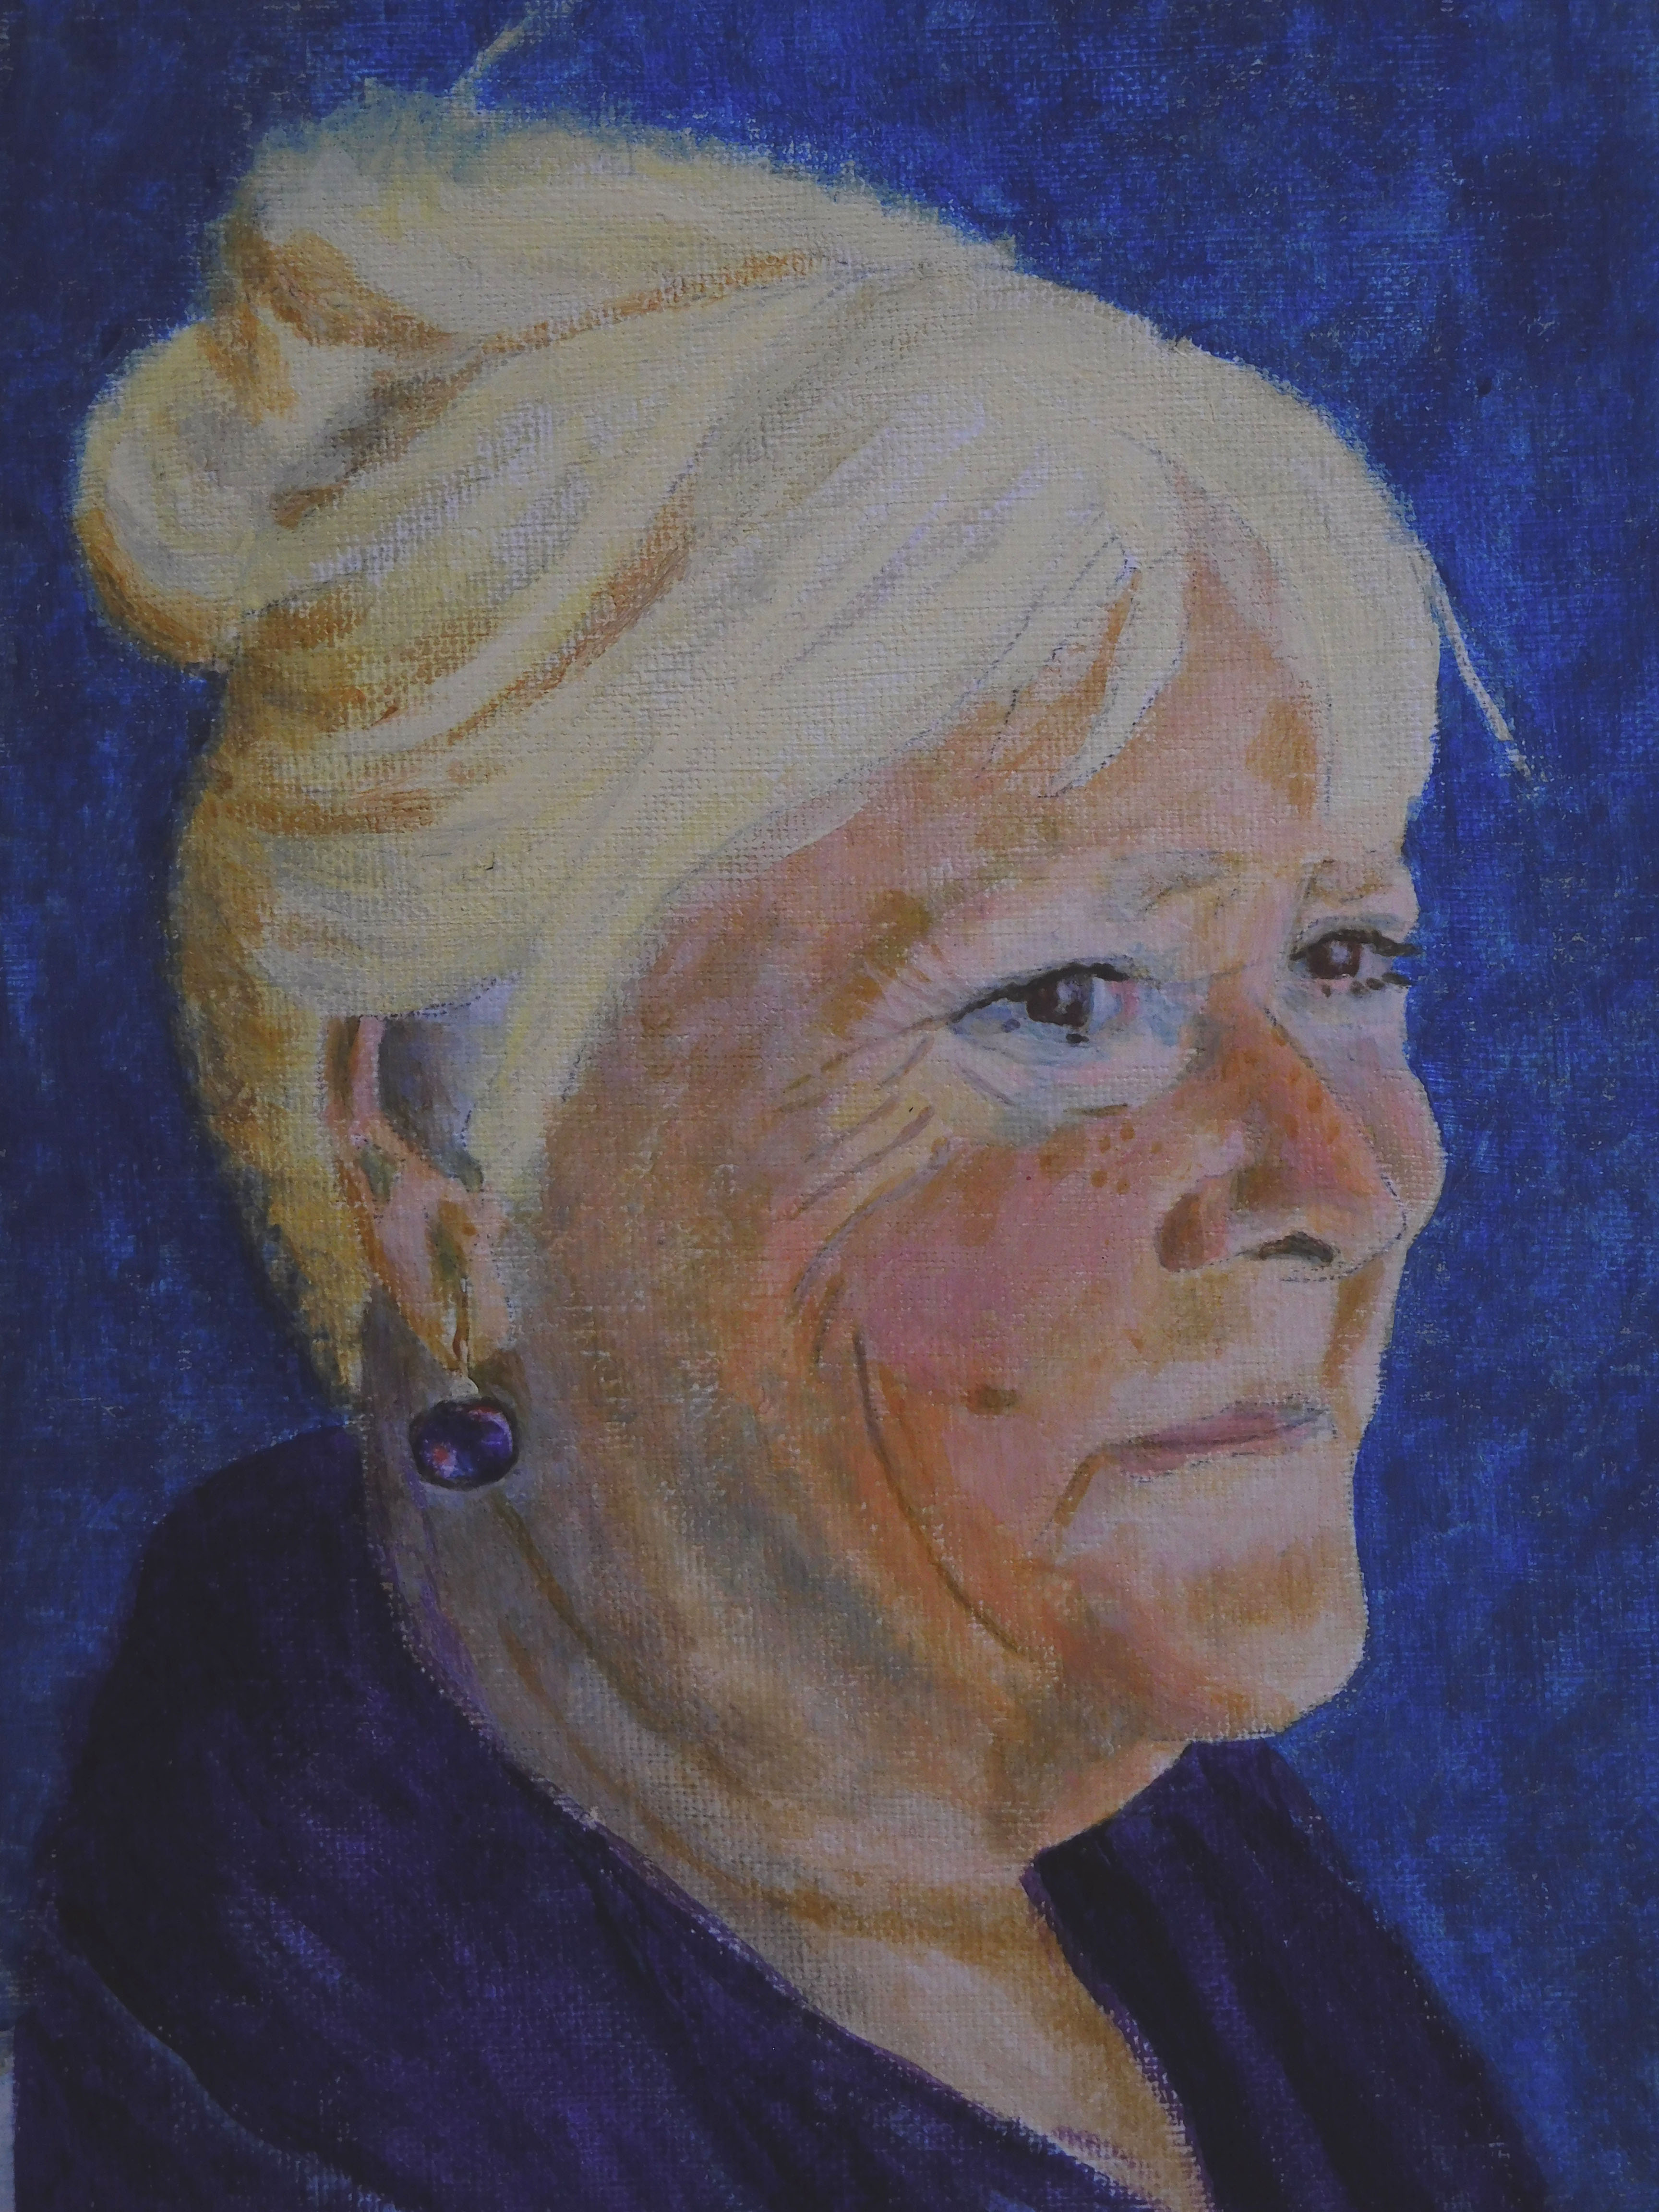
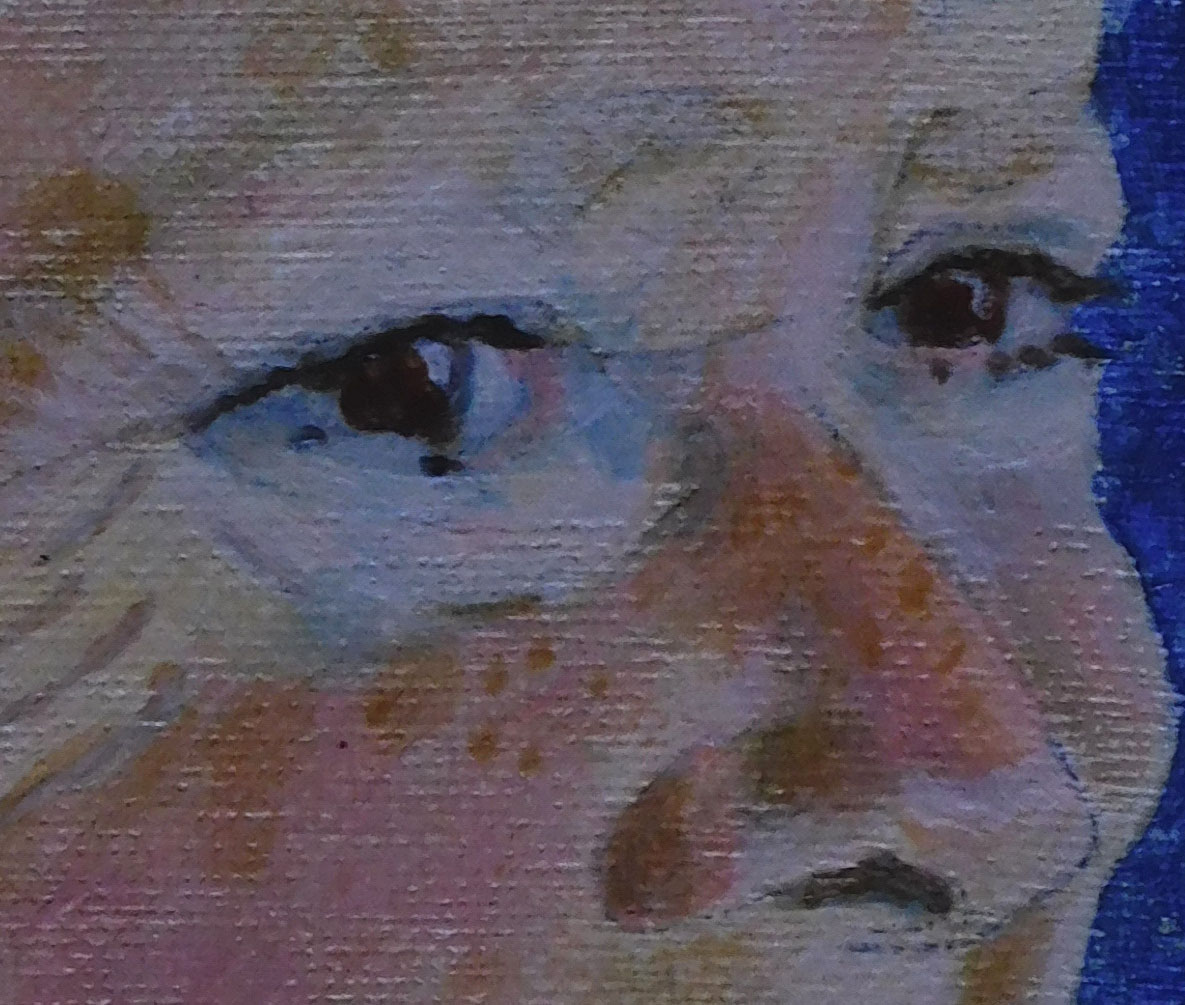
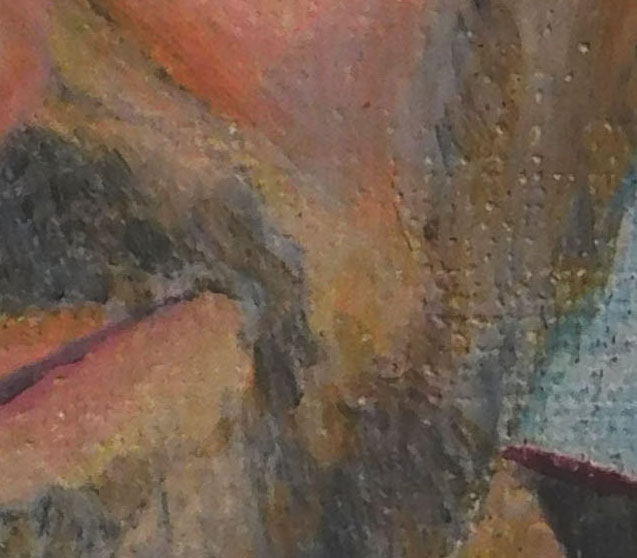
After that I just keep adding colour glazes to build up to the finished article. At this stage the face has had successive glazes of pinkish skin colour and the background has been added to bring the head forward.
|
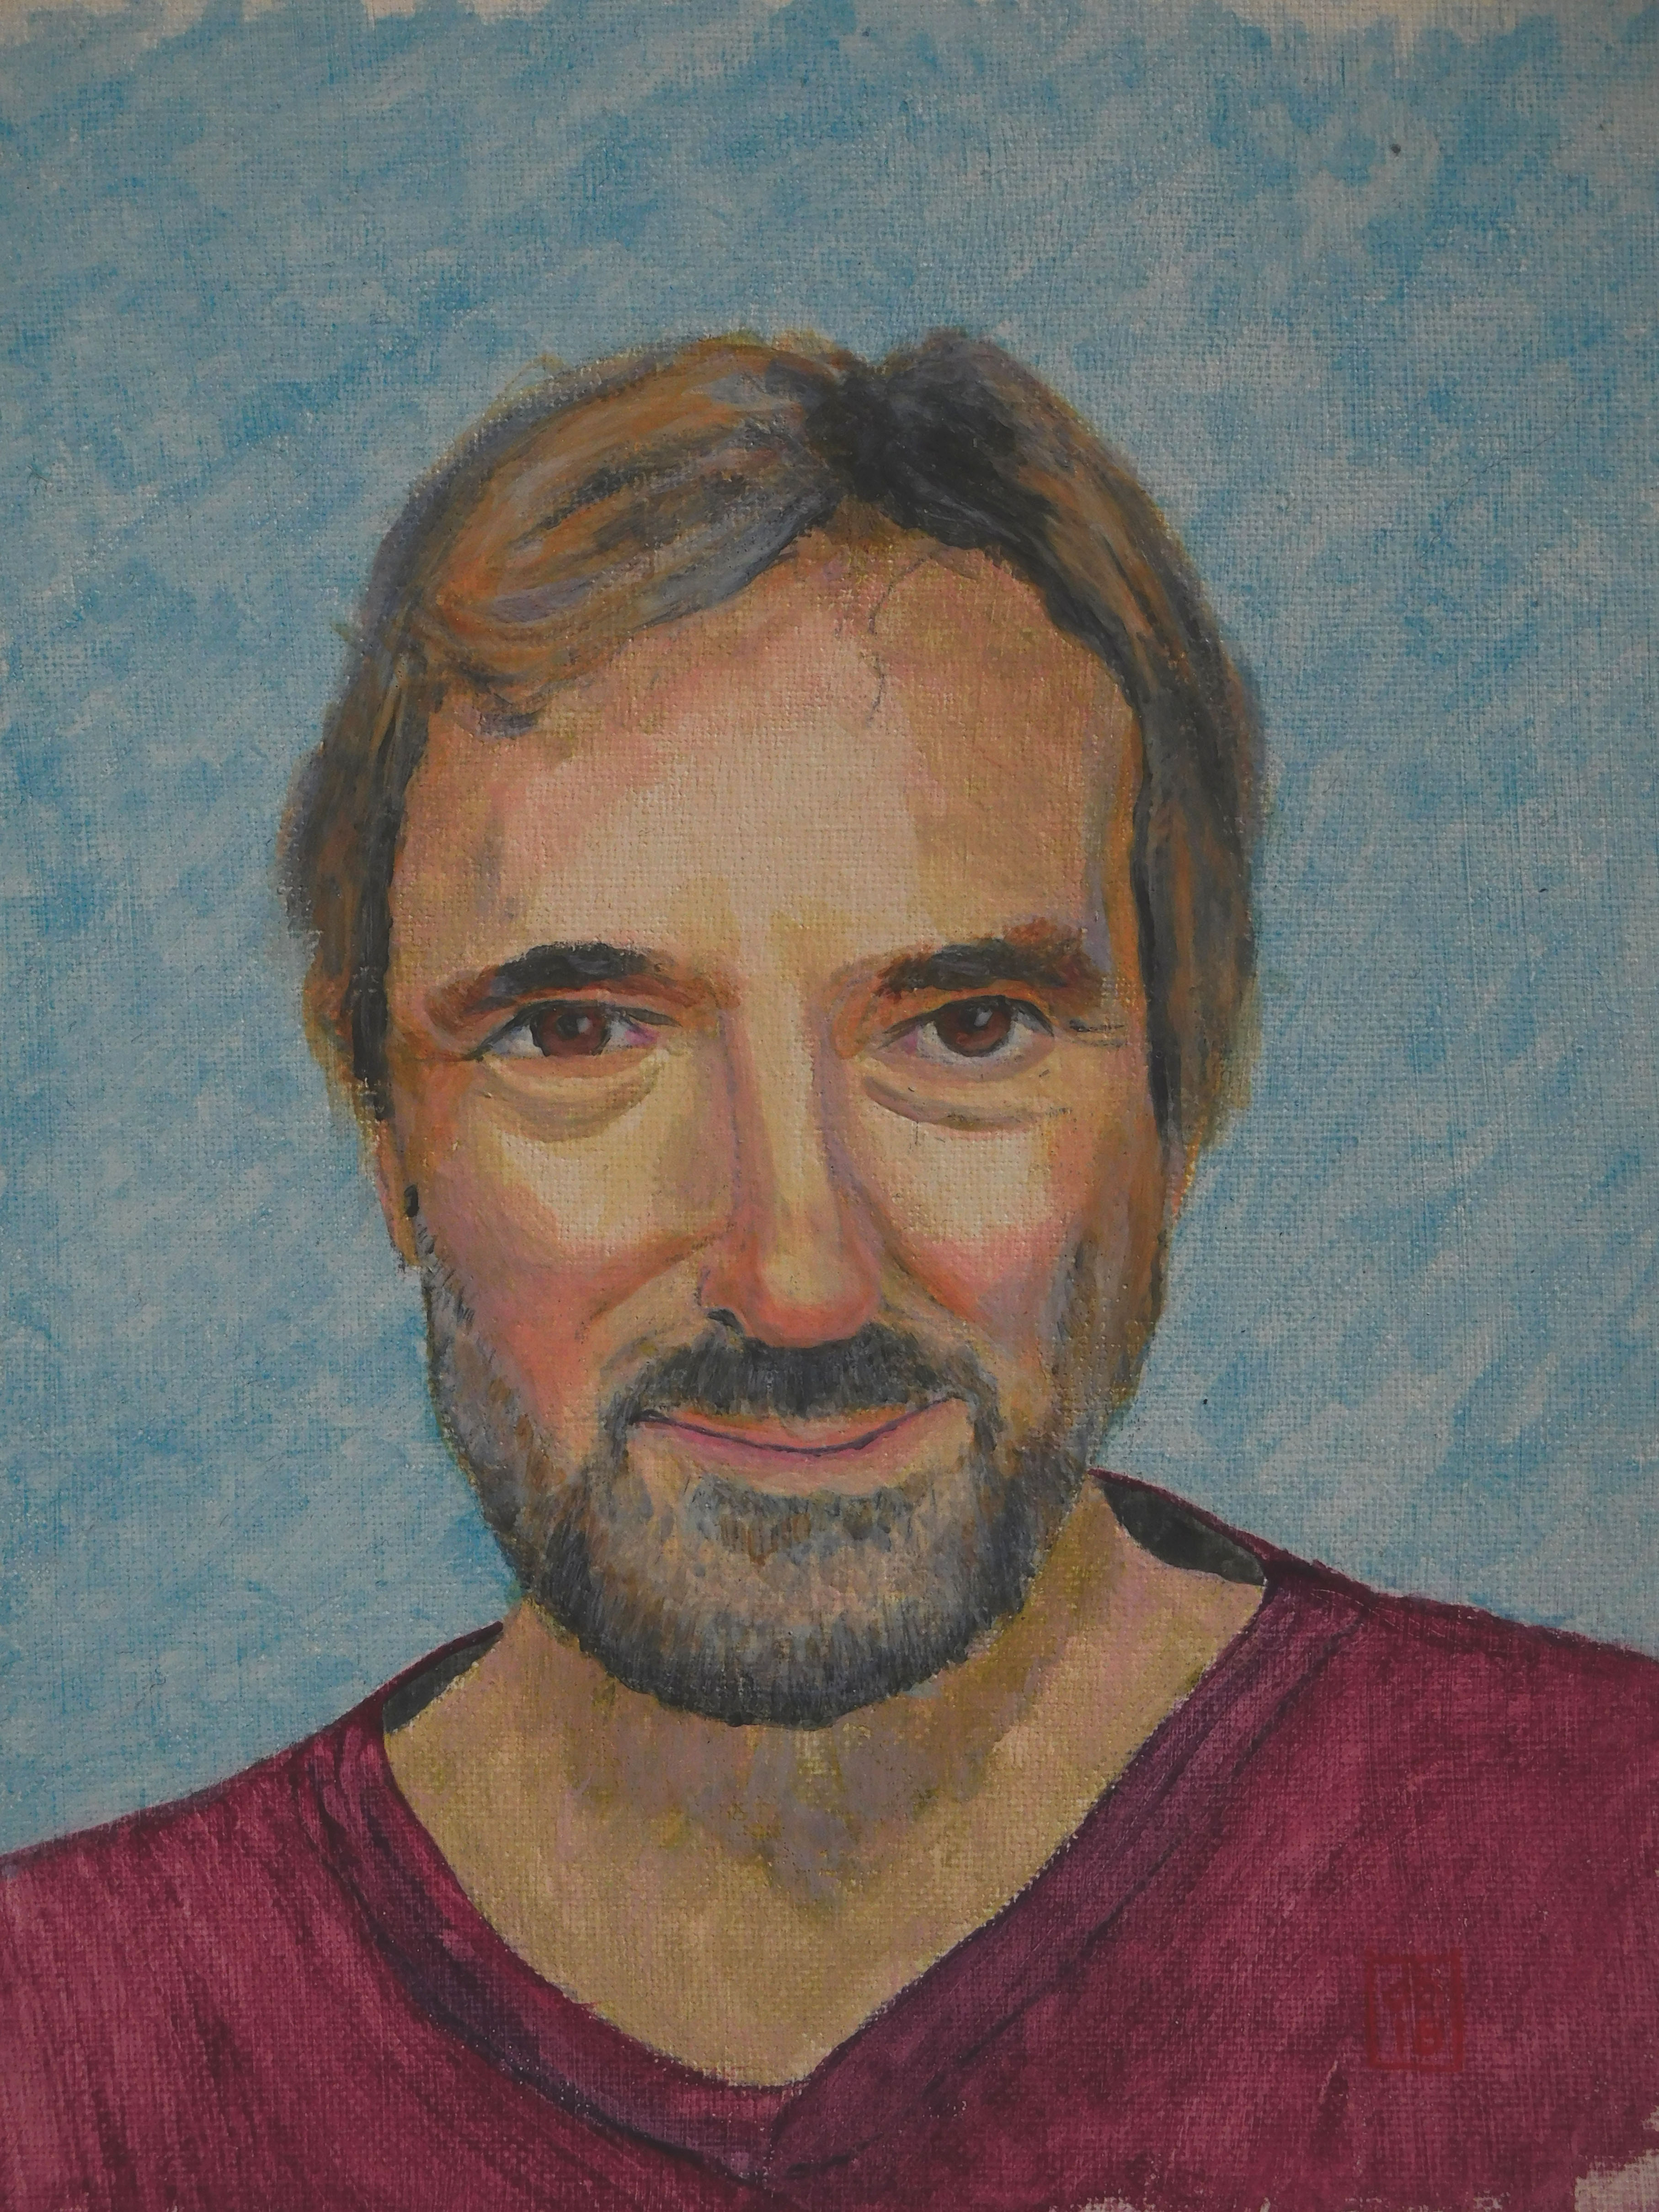
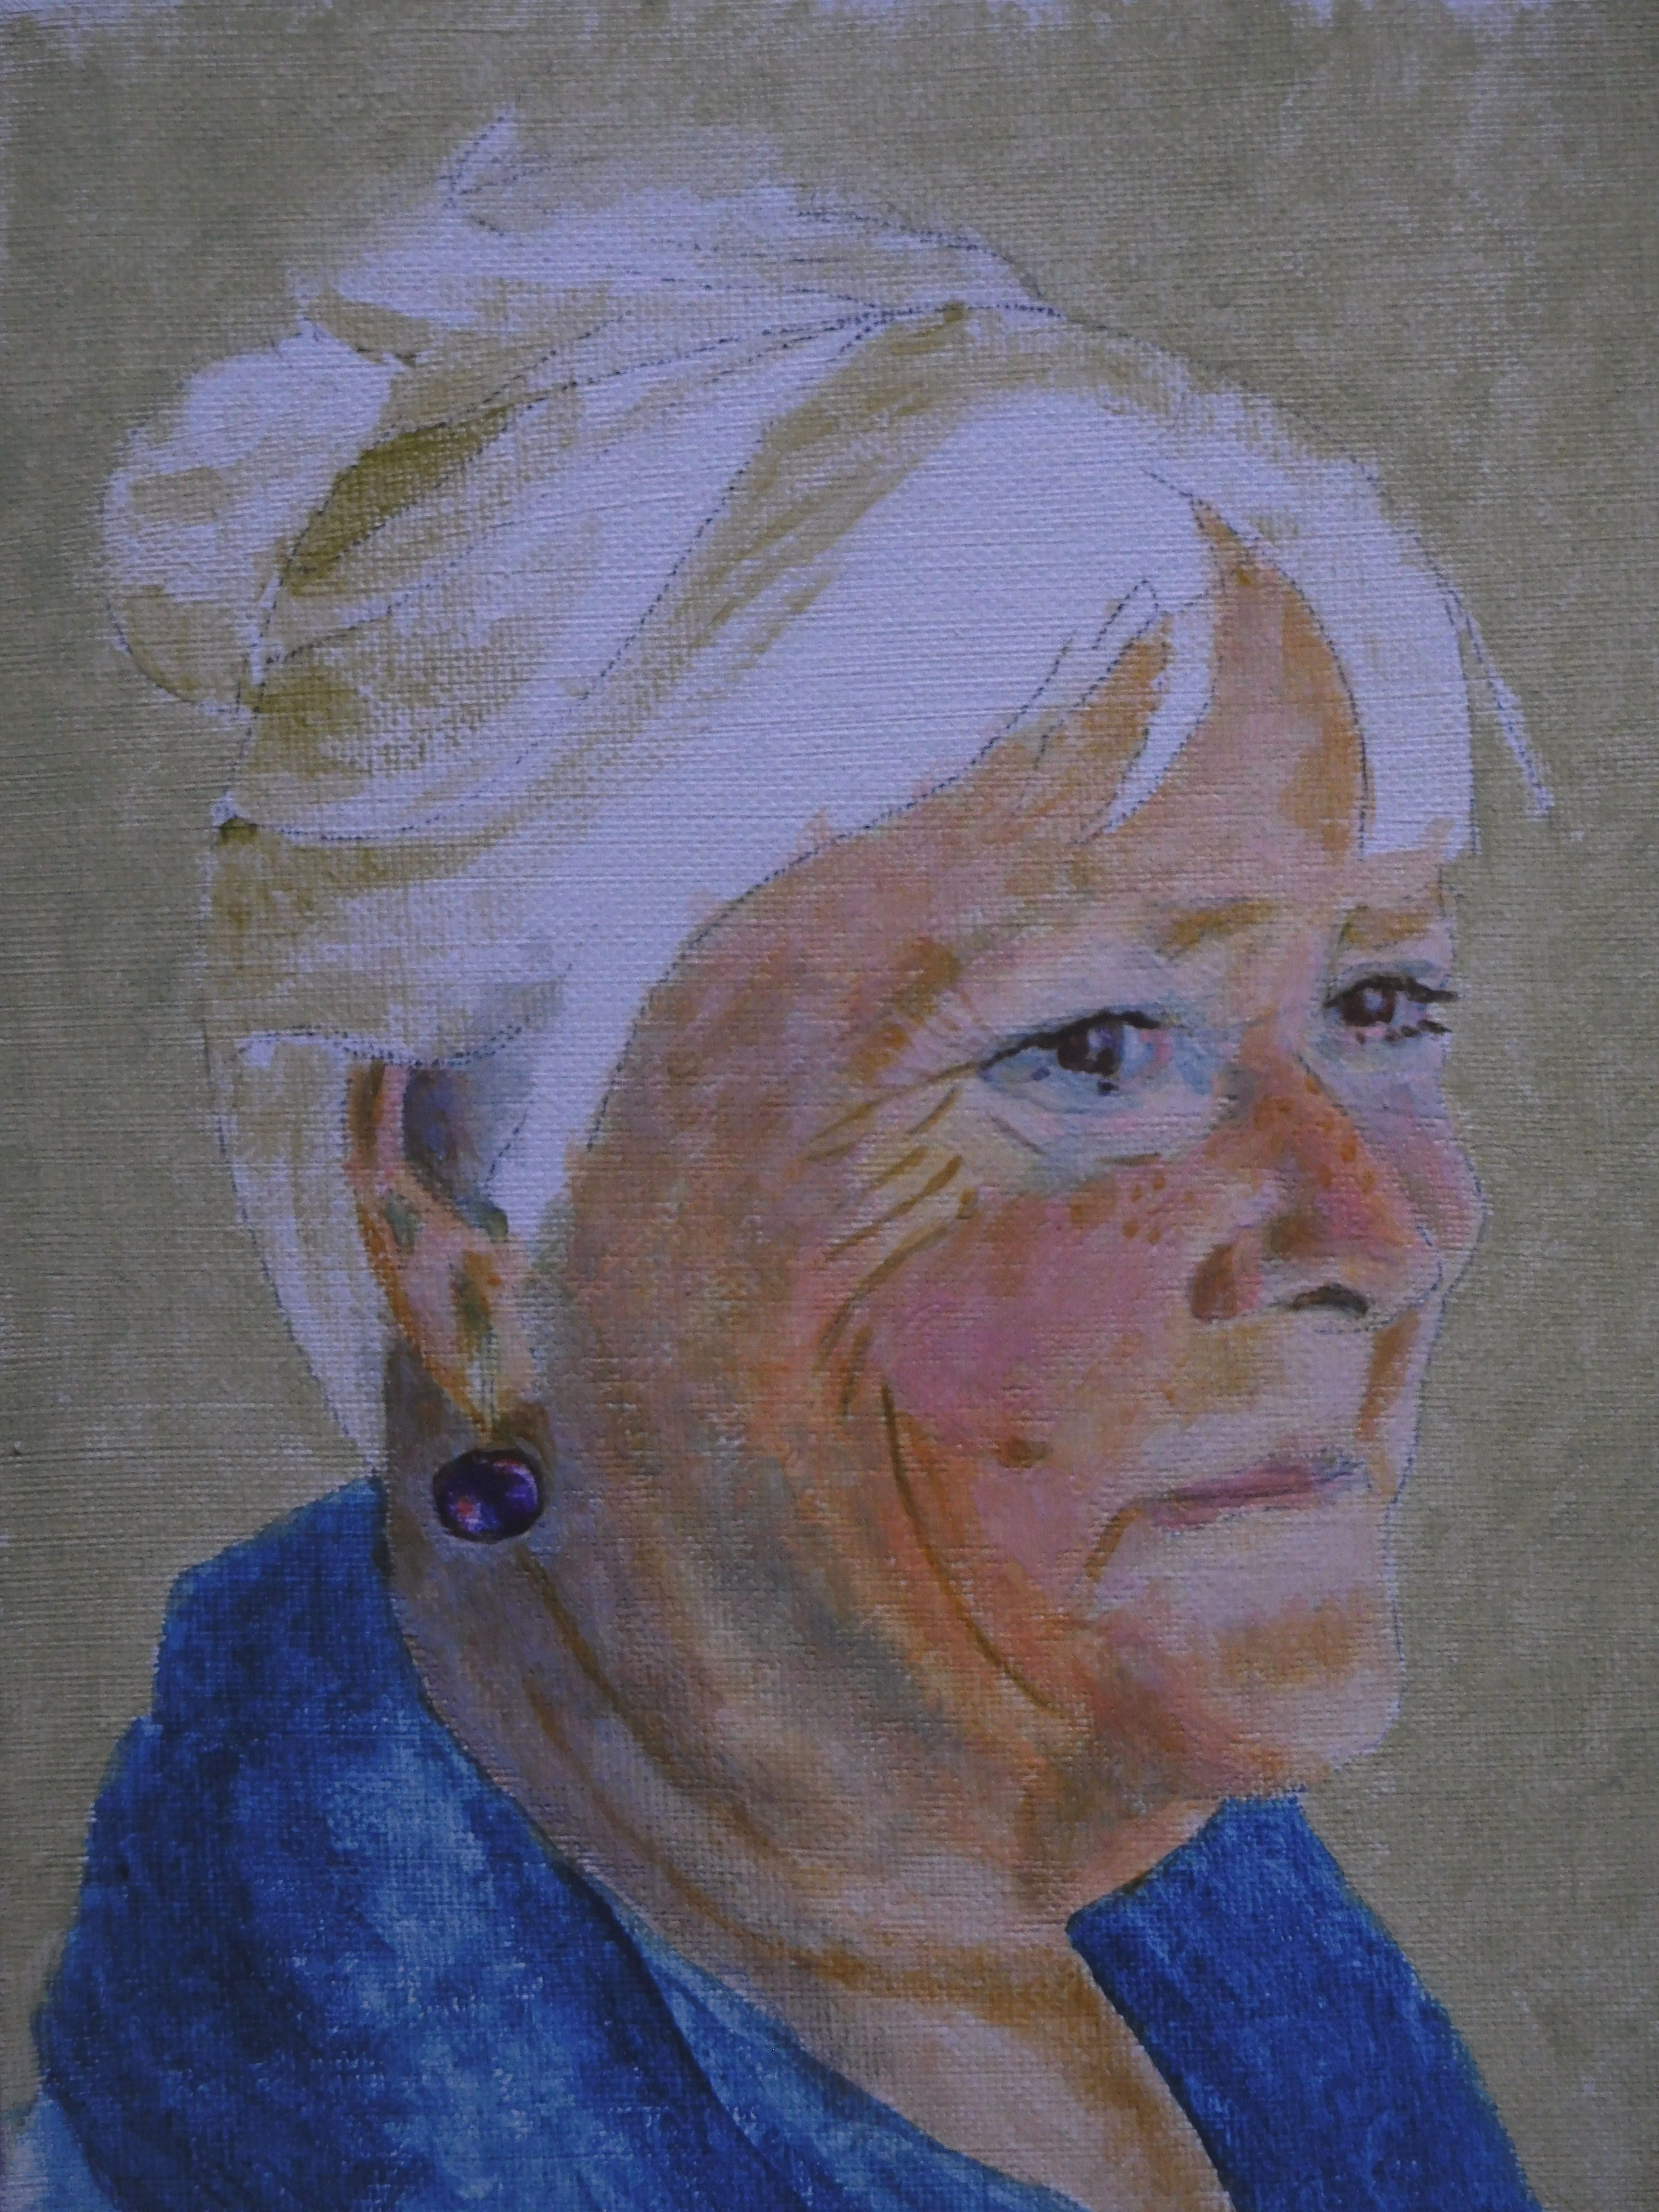
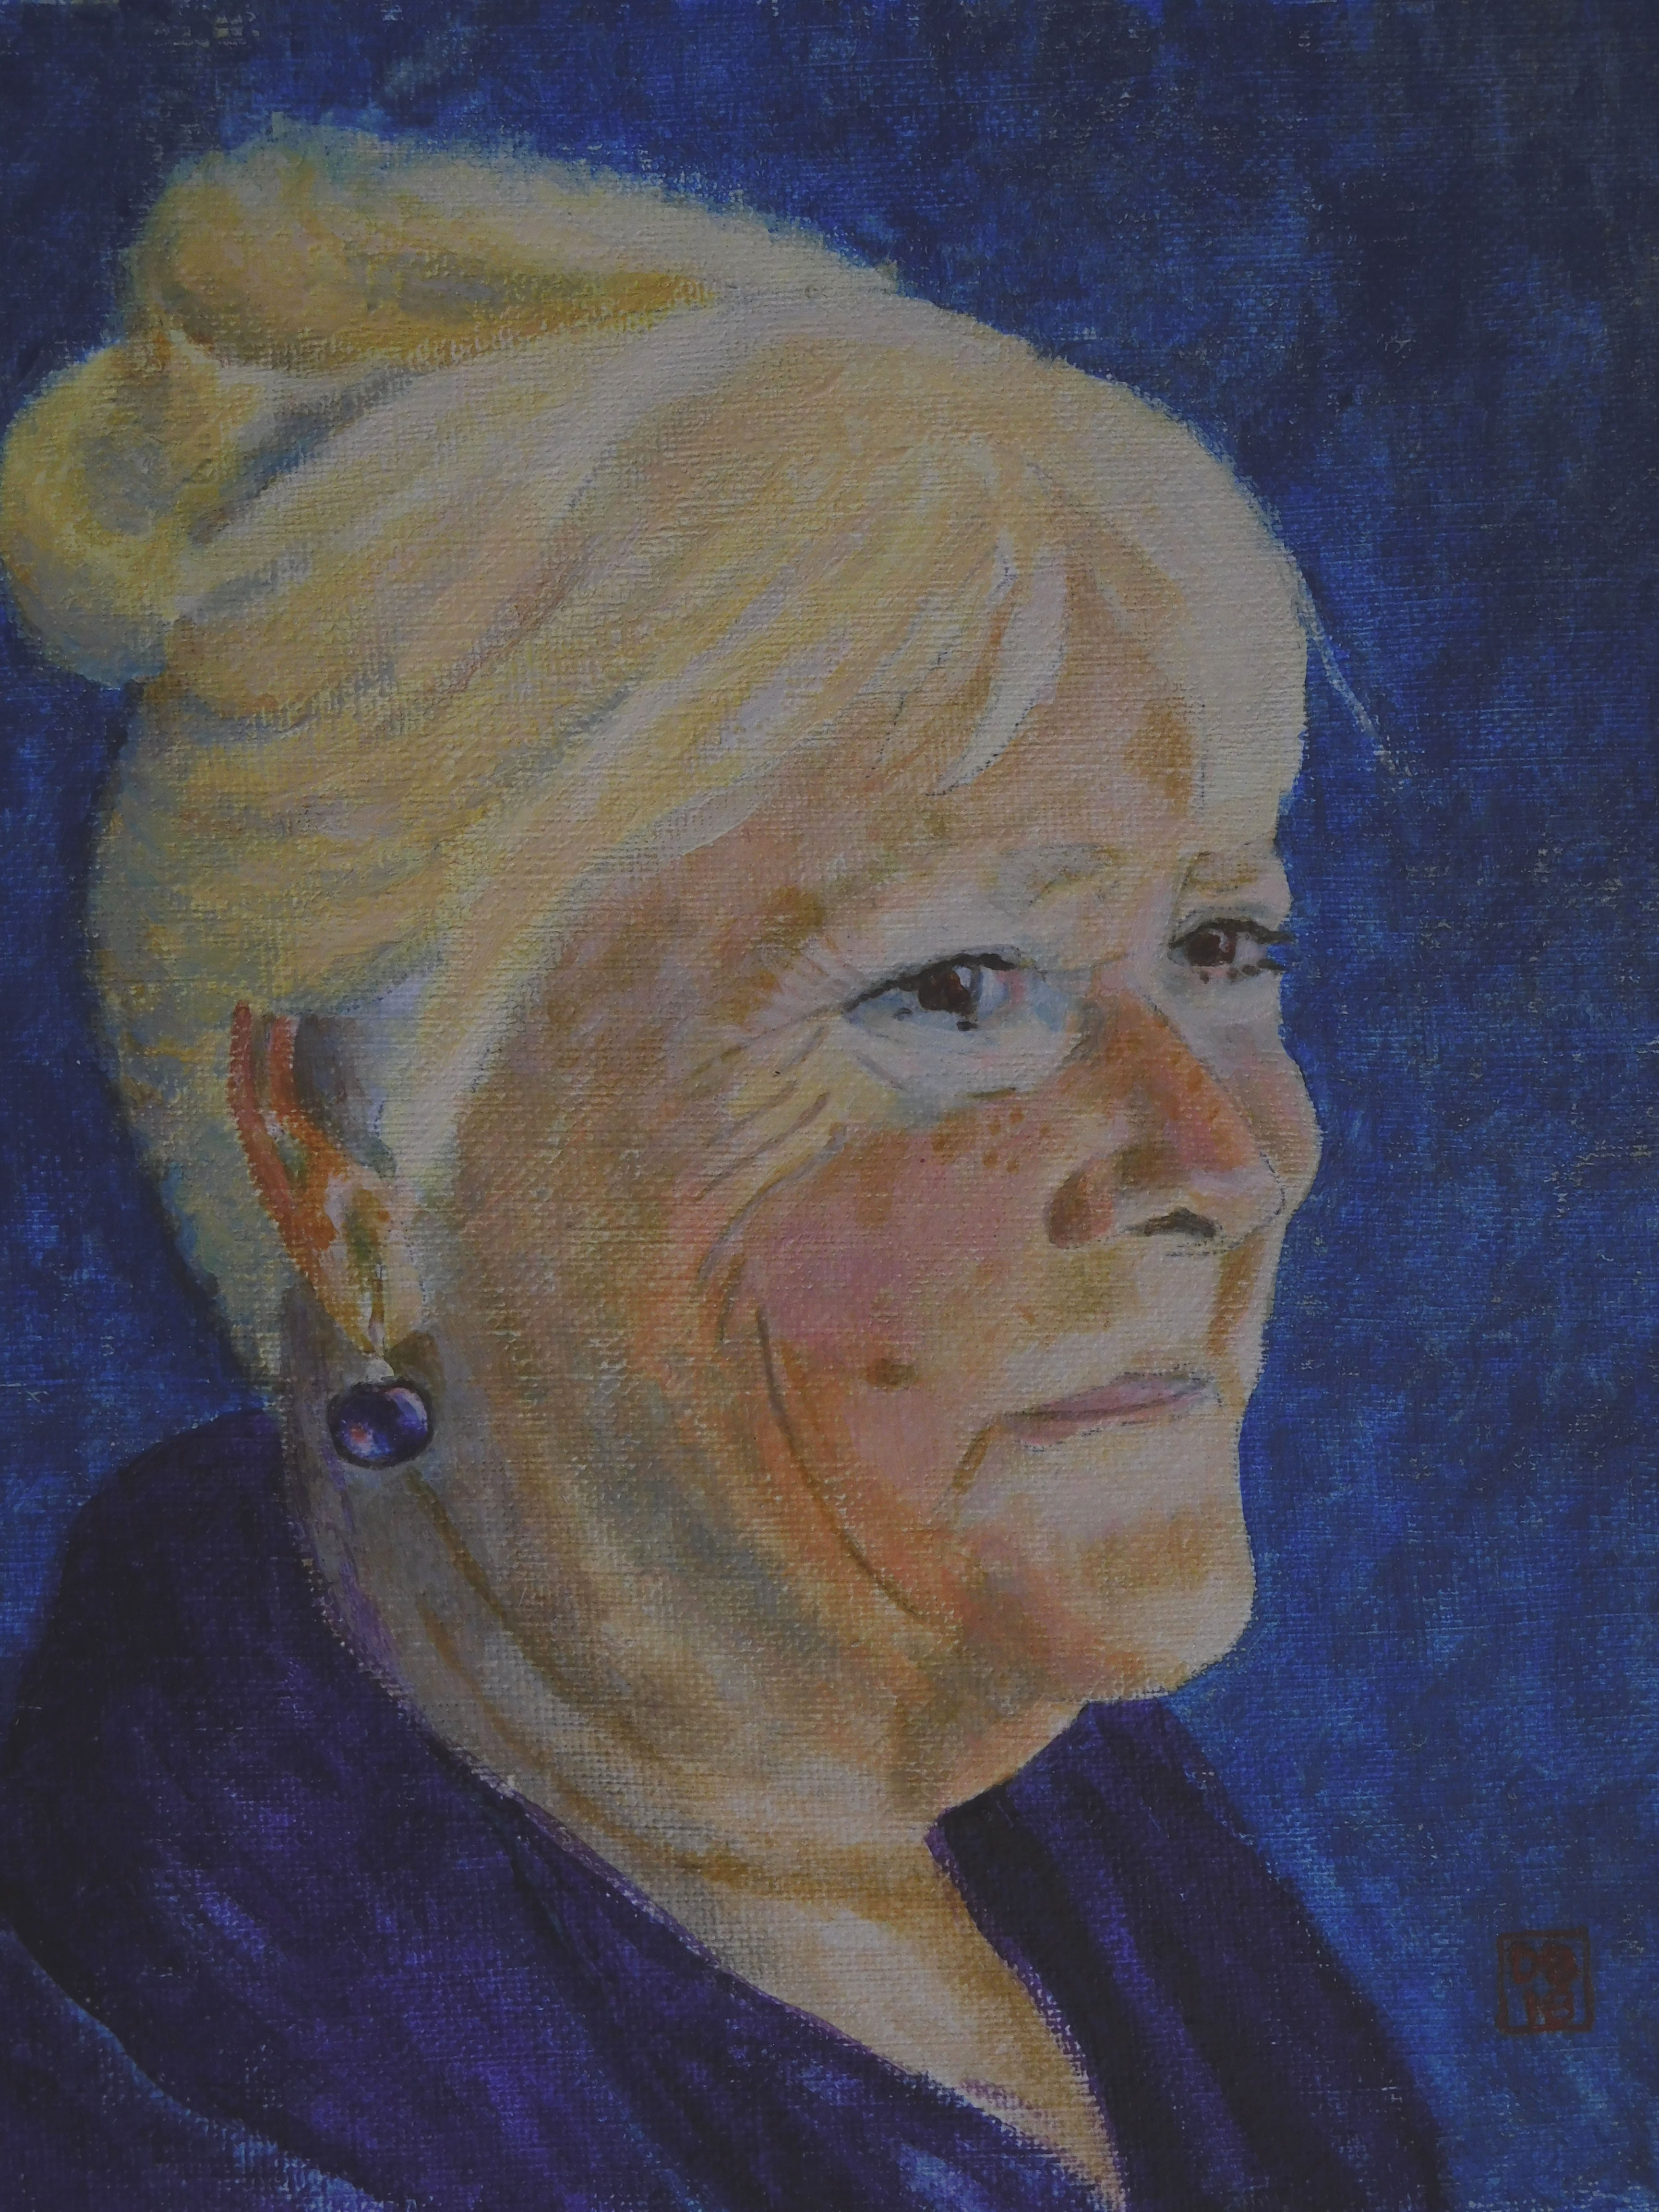
And finally I found I needed some colour correction with transparent light blue as a final glaze then I improved the highlights with opaque white. Because the egg yolk is itself a fairly dense pigment achieving a pure white is almost impossible. In a similar way a blue gets pushed towards green. This makes it important to experiment with a given set of paints and different eggs - farmed eggs tend to have paler yolks than free-range.
|